Category Archives: Biscuits and cookies

Hummingbird Homework

After my trip through my archives last time with my Top 5 Bakes, I’m very glad to say that my baking mojo did come back.  I went to New York, found N.Y. Cake (among other things) and bought myself a bundt tin.  I got back and opened Edd Kimber’s Patisserie Made Simple at Kougelhopf.

Enriched dough, a funny shaped tin, and the challenge of working out how much mixture I’d need to fill it (it says it’s for a six cup cake – very American and very confusing), what could be more adventurous?  Then my son came home with his latest homework project.

He’s learning about fairy tales at the moment and, this week, he had to make something to go in  Red Riding Hood’s basket to take to Grandma. A vast improvement on the poster he had to make last week to explain why he liked his favourite fairy tale.

“What is your favourite fairy tale?” we asked

“Rumpelstiltskin.”  We raised out eyebrows.

“What is it about Rumpelstiltskin that you like?” we asked. The betrayal, we wondered, the slavery, attempted child abduction, forced marriage (although perhaps I’m being a bit unfair to the Brother’s Grimm here. They did say that the miller’s daughter – they didn’t even bother to give her a name – had fallen in love with her captor, the King.  Perhaps we’re looking at the very swift onset of Stockholm syndrome rather than forced marriage, but even so…)

“I like the bit where Rumpelstiltskin gets so angry he jumps up and down on the floor and breaks it.”

It was that simple.

Anyway, back to Red Riding Hood.  I snapped Patisserie Made Simple shut. My kougelhopf was doomed.

“What do you want to bake for Red Riding Hood?”

“White chocolate chip cookies.”  This was a relief.  The last time my son expressed a desire to make biscuits only custard creams would do.

We went with a recipe from The Hummingbird Bakery Cookbook.  The recipe was for white chocolate and pecan nut cookies but, because Matthew wanted to take some to school, and because the school is nut free, we couldn’t use the pecans.  We doubled up the amount of chocolate instead.

We washed our hands, gathered our ingredients, and started by creaming unsalted butter with caster sugar and light brown sugar in the KitchenAid.

My trusty assistant measured the sugar into the bowl and I stood by with a teaspoon to get the extra 25g out before it touched the butter (perhaps I’m being a bit harsh here, since I often have to do this when I’m baking by myself, but why not blame a five-year old when you have the chance?)

We held onto the KitchenAid as it beat the butter and sugar together until it was light and fluffy, and then Matthew added eggs – he’s pretty good at egg cracking.  It’s very rare that we have to fish any bits of shell out of our cake mix these days.  

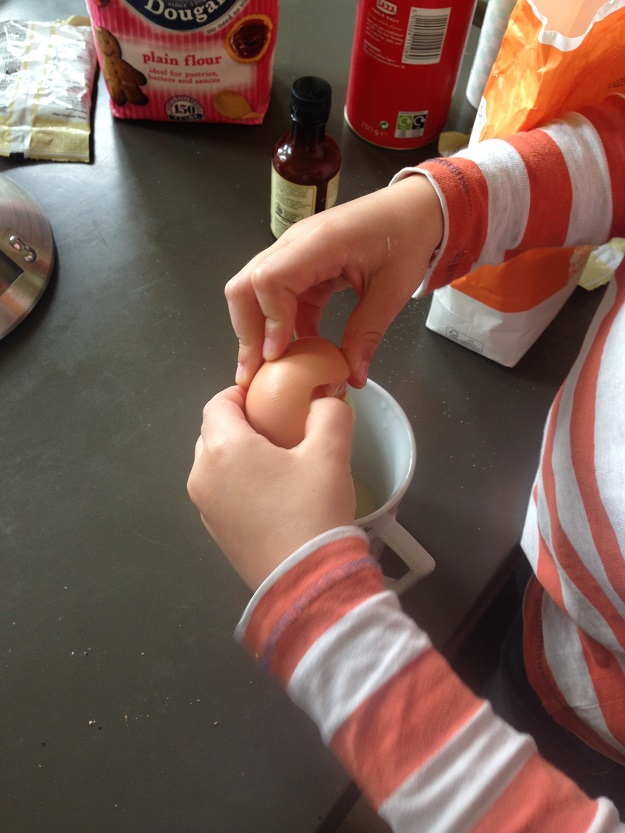
We turned the KitchenAid on again and added some vanilla extract.

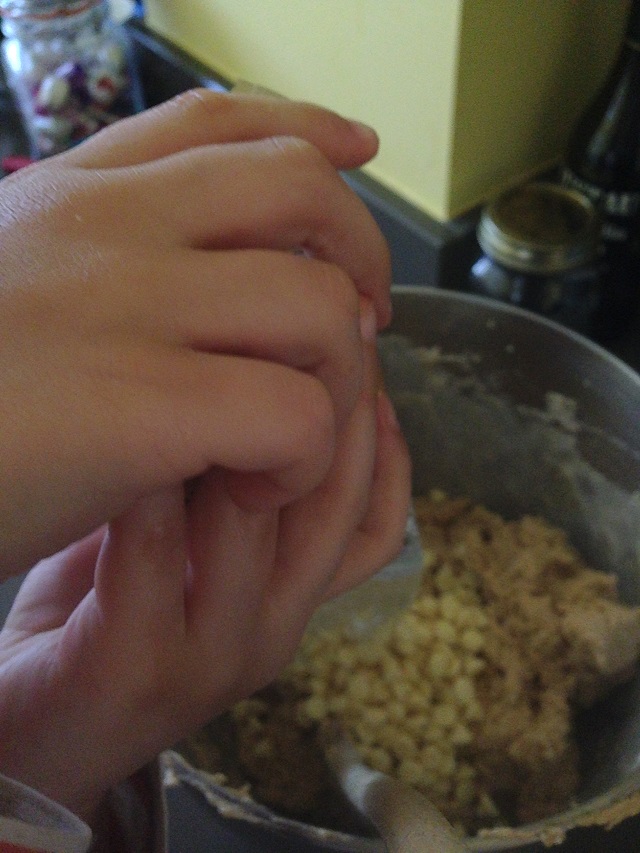
We stirred in plain flour, salt and baking powder.  The recipe didn’t say anything about sifting, so we didn’t.  It also didn’t say whether we should use the mixer, so we didn’t.  We both had a good go with a wooden spoon and, eventually, we had cookie dough.  Matthew and his sister added the white chocolate chips, carefully reserving enough to keep them going until snack time.

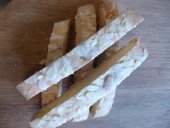
After incorporating the chocolate chips, the recipe says that you should divide the dough into two, make two rolls of between 15 -18cm, wrap them in clingfilm and put them into the freezer.  Our dough was a bit sticky and I knew that trying to shape them and then put them into clingfilm wouldn’t work, so we dumped our mixture directly onto the clingfilm and shaped them once they were wrapped up.

We put the two rolls into the freezer to set and went off to play – well Matthew went off to play.  I put the dirty bowls and things into the dishwasher.

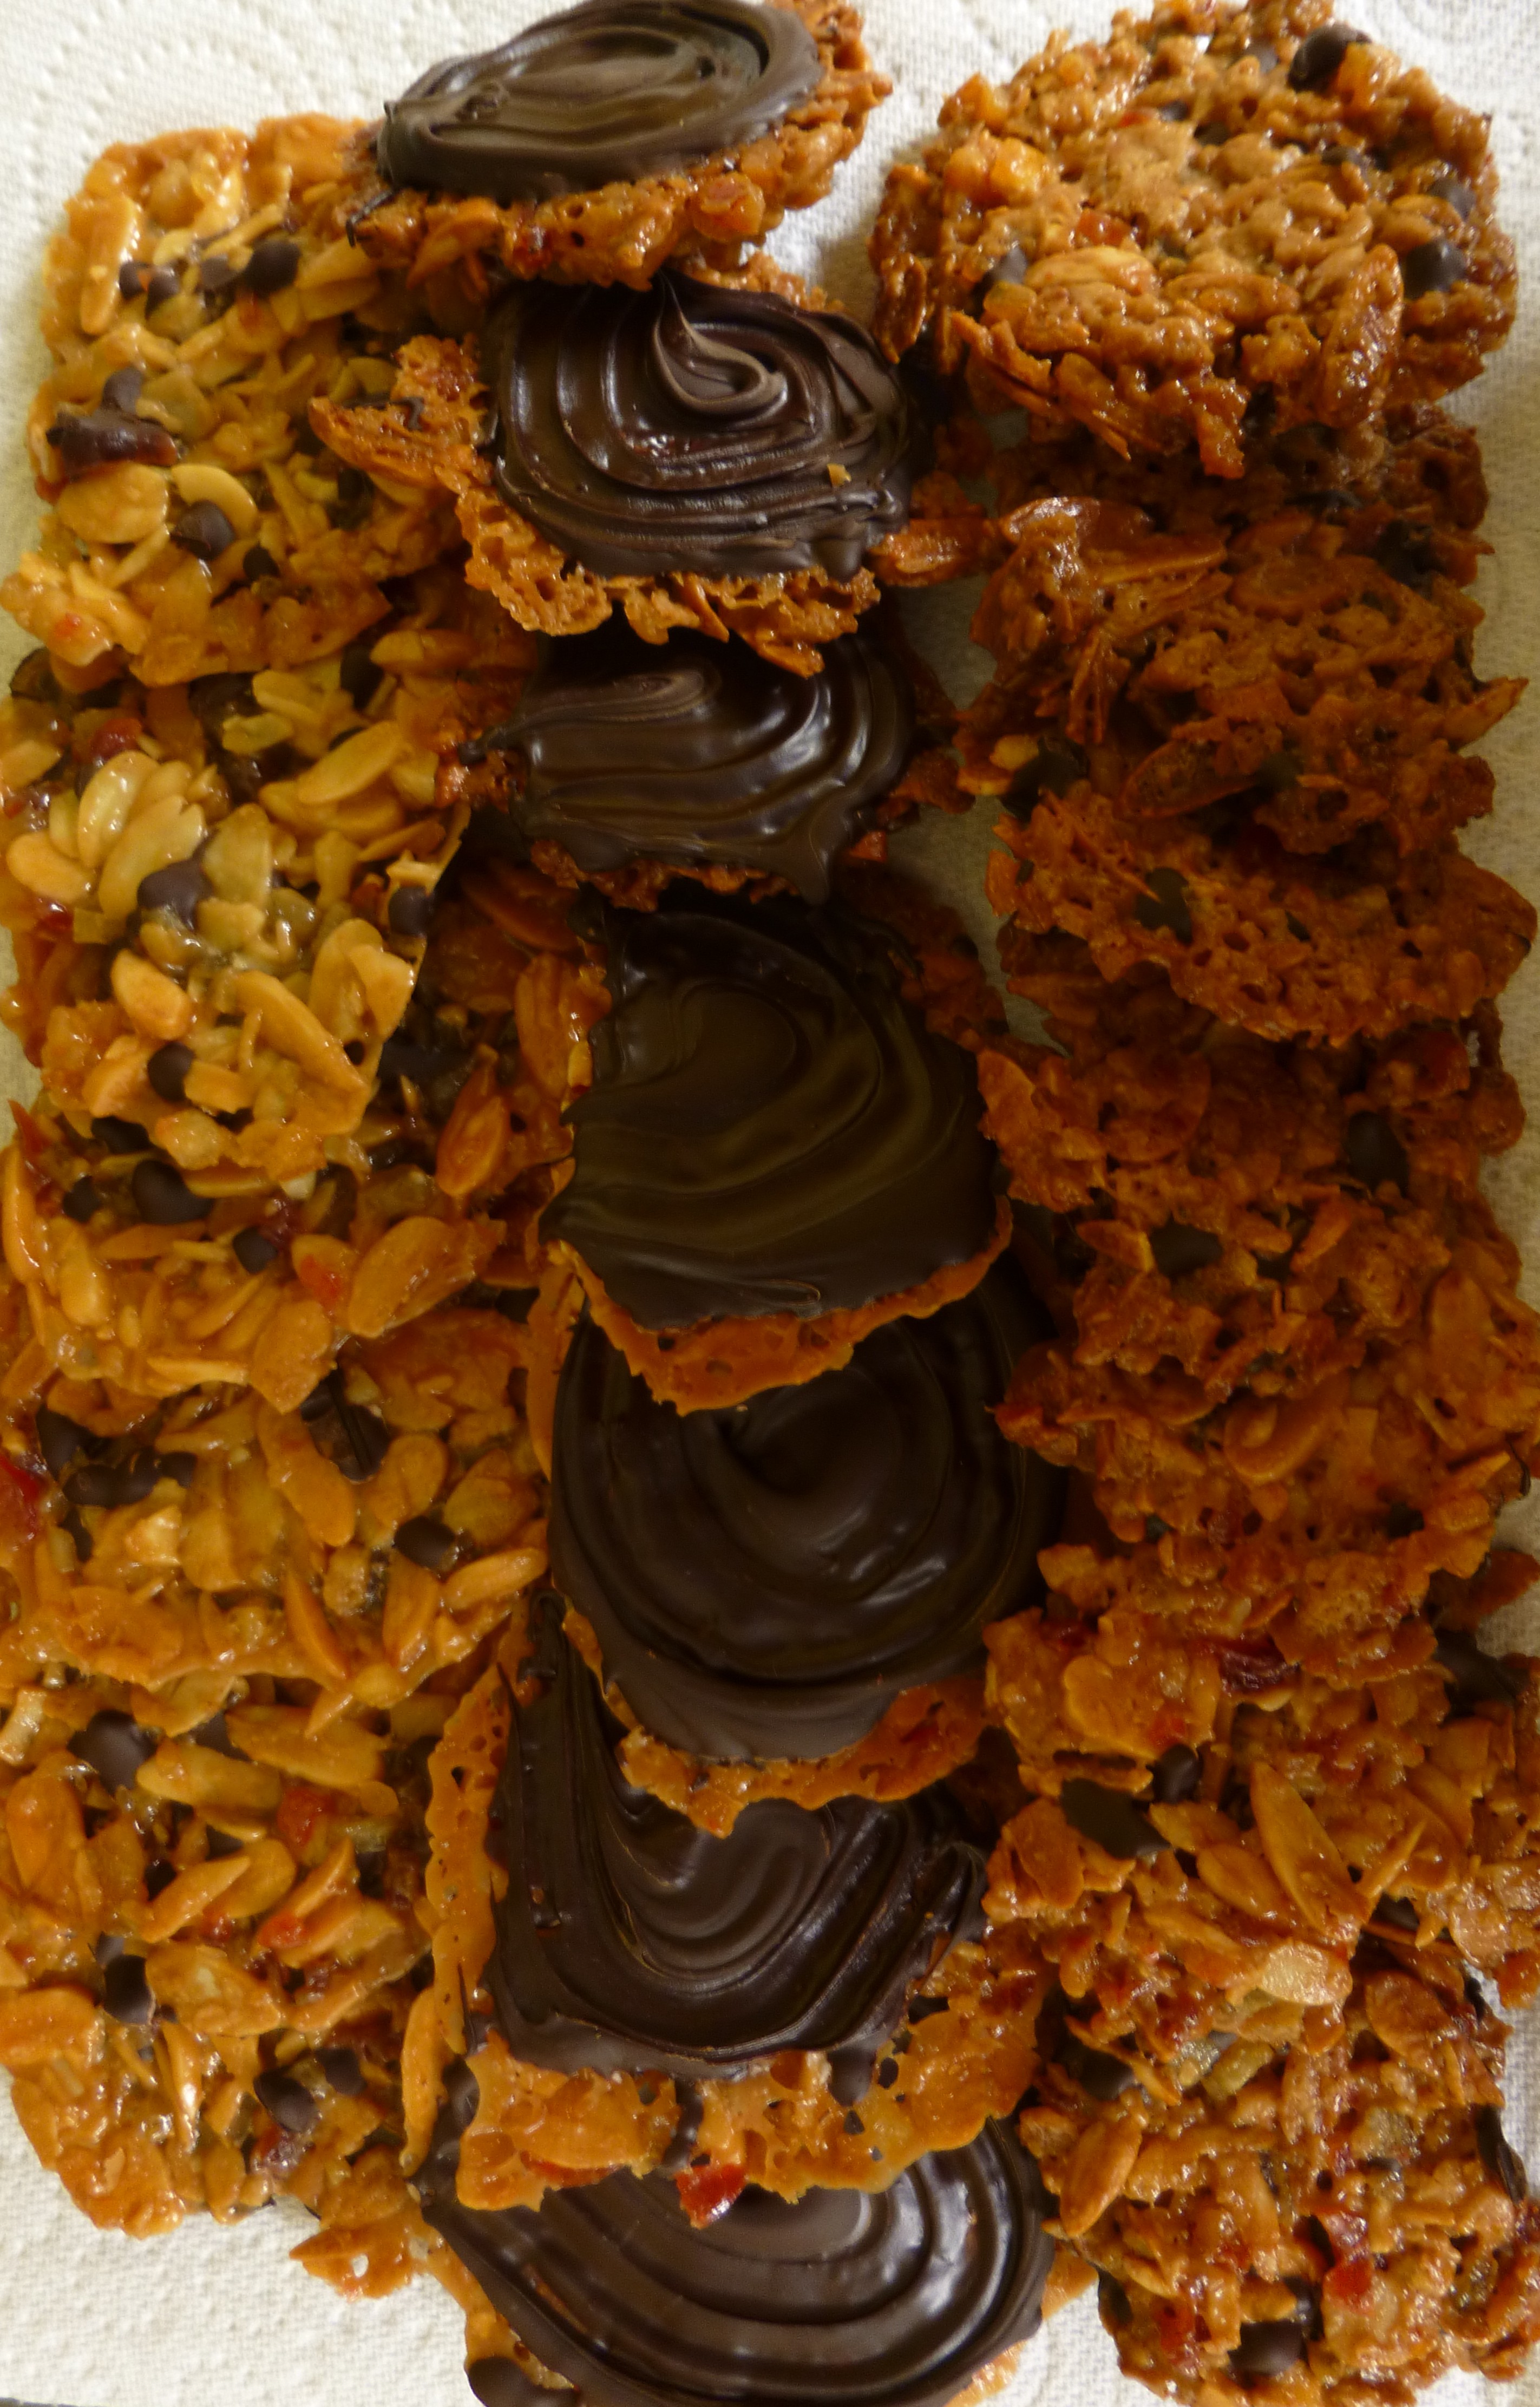
We came back to our cookie dough a couple of hours later.  I sliced it into discs and Matthew transported them across the kitchen onto baking sheets that we’d lined with baking paper.  I put them into the oven at 150°C and set the timer for 10 minutes (the recipes says they should take between 10 and 15 and be golden brown at the edges and quite flat).  I didn’t think they were done at ten minutes and, in the end, I gave them about 18.  I should have had faith in the Hummingbird though because the cookies were a bit on the crispy side once they’d cooled down.

They tasted fine, sweet white chocolate and vanilla, tempered by a tiny bit of salt.  Very nice.  Matthew took a few to school and we’ve had no complaints – at least none so far.

Next week,  kougelhopf.   I promise.

Viennese Whirls

I did have good intentions when I said I was going to bake the technical challenges from the Great British Bake Off.  I started well with the jaffa cakes, but it has taken me a few weeks to catch up with Mary’s Viennese whirls  and the dampfnudel.   I don’t think I’ll be attempting lacy pancakes any time soon.  I can’t really see the point.

Anyway, Viennese whirls, here they are.

Viennese whirls

I really didn’t think they’d be too much trouble.  A bit of jam making, a bit of piping.  What could go wrong?

I started by boiling raspberries and jam sugar together.  I didn’t have a thermometer to tell me when the mixture hit jam o’clock, so I followed the recipe and boiled it for four minutes.  I poured it into a bowl and left it to cool.  It might set.  It might not.  I had no idea.

Next, I drew some circles on baking paper as templates and started on the biscuit mixture.  I softened unsalted butter in the microwave.  I left it a bit too long.  It was definitely on the melting side of very soft when I took it out.   I didn’t fancy starting again so I put it into the KitchenAid with some icing sugar, draped a tea towel over the top to avoid an icing sugar cloud and beat the butter and sugar together until the mixture was pale and fluffy.  I added plain flour and cornflour and mixed again.

Now for the piping.  Piping is not and, I don’t think ever will be, one of my baking strengths.  I did invest in some disposable piping bags after my last piping disaster, but I still ended up with an overflow of biscuit mix that oozed over the top of the bag, down my arms and onto the kitchen table.

I had a terrible time piping my biscuits onto the templates.  I don’t think my piping nozzle was big enough, and I got stringy, stingy, looking blobs.  The mixture was supposed to make twelve whirls – so twenty-four biscuits.  I had an awful lot left over.  Instead of beefing up my twenty-four biscuits, I made extra.  I also whirled from the outside in.  I’m not sure where I’d left my head.  It certainly wasn’t in the kitchen.  My Viennese whirls looked pitiful.

Viennese whirl mixtureI baked them for 15 minutes at 170° fan.  They came out looking very sad and thin.

Once they’d cooled I sandwiched my thousand and one biscuits (I didn’t have quite that many, but it did feel like it) with the raspberry jam and buttercream which I made with butter, icing sugar and vanilla extract.

I’d tried a couple of the biscuits before making the jam and buttercream sandwiches. They tasted overdone and had a sandy texture.  I wasn’t looking forward to doing a final taste test. Perhaps this one would best be left to the children and husband.

You know what though?  They were completely transformed by the filling.  True, they were nowhere near the melt-in-the-mouth Viennese whirls that Mr Kipling makes, but the jam and buttercream masked the imperfections in the biscuits well enough.  I may try making them again one day, but only when I’ve sorted out my piping problems.

Custard Creams and Kids

P1010823 (640x480)“Can we cook something today Mommy?”

“Er, yes, what would you like to make?” – I braced myself for cornflake cakes.  Not that I have anything against making cornflake cakes.  I just don’t like eating them.

“Some biscuits.”

“OK.  What kind of biscuits?”  I don’t know why I asked.  When it’s biscuits, it’s always Smartie cookies.  Not as bad as cornflake cakes, but not something I’d choose myself.

“Custard creams.”

“Custard creams?  Really?  Are you sure?”

“Yes.”

I had meant to make custard creams at a vague point in the future. A compare and contrast bake.  I wasn’t overly confident about it.  How can you possibly beat a Crawford’s Custard Cream?  And a custard cream with children?  This had disaster written all over it.

“Er, OK.”

There’s a custard cream recipe in the Hummingbird Bakery’s Home Sweet Home.  It’s for biscuits to top their custard cream cupcakes which sound and look delicious. Cupcakes, biscuits and children though.  Far too complicated.

The children were keen.  They put their aprons on, rolled up their sleeves and promptly disappeared as I started our custard cream preparation.

First, I lined all of our baking trays with baking paper (the recipe is for sixteen complete biscuits but the Hummingbird is reliably generous) and set the oven to 150° fan.  I softened some butter in the microwave (it took a minute and a half on 360W) and just about managed to cream it together with caster sugar in the KitchenAid.  This has now developed a habit of flinging the mixing bowl off the stand unless you jam it on so hard that getting it off again could break Hercules.  Great.

Matthew is a keen egg breaker so he came and helped with the next bit.  His method is slightly unusual.  He bangs the egg on the side of the bowl to break the shell, then, very carefully, without putting his fingers in the crack, he squeezes the shell until it explodes.  Generally, we end up fishing a lot of shell out of our cake mixtures.  This time though, we managed to add an egg without any shell at all, or none that we could find.  Nice one Matthew.

P1010814 (640x480) After adding the egg and giving me strict instructions to let him know when he could come and lick the spatula Matthew disappeared again.  I sieved plain flour and cream of tartar into a bowl and mixed it into the butter/sugar/egg mixture.  I have used cream of tartar before, but I think it was in a meringue.  I Googled it later and found that it can be used in biscuits instead of baking powder.  Once the flour and cream of tartar was mixed in, I had a soft dough that didn’t leave very much behind for bowl and spatula licking once I’d tipped it onto the work surface.

The children were back.  They got some dough, cutters and a floured board.  They squeezed and squished, and I rolled and, together, we made 42 biscuits (using a 4cm cutter), four sharks and two rabbits.

P1010816 (640x480)


They went into the oven for 15 minutes (this is a bit longer than the time given in the recipe, which says 10-13).

We let the biscuits cool and we, sorry, at this point, it was I again, made the buttercream filling.  I made a quarter of the Hummingbird recipe, because I hadn’t made the cupcakes.  I could have made less, since I had enough to fill a sandwich cake as well as the biscuits.  I mixed sieved icing sugar with softened butter and, when it was combined, I added milk and some vanilla extract.  Then came the food colouring.  I can never get food colouring right.  Usually, I don’t add enough and end up with an anaemic tinge.  This time, I got high-viz.  Well, it was for a custard cream.  Who needs pale and interesting?

The recipe suggests using a piping bag to fill the biscuits.  No way.  Not with the children around.  In my world, a piping bag is usually much more trouble than it’s worth.  There’s the mess you make filling it up, the mess it makes when it dribbles filling everywhere other than the place it’s supposed to be, and cleaning it…. add to that the possibility of having to thwart the attempts of a small person to fill up a bucket of water in the bathroom and bring it downstairs.  I’ll say it again.  No way.

As it was, filling the biscuits with a knife was a bit fiddly, but I was pretty pleased with the end result.

P1010823 (640x480)

Here’s the shark.

P1010824 (640x480)The rabbit, unfortunately, met his doom before the photocall.

So, did the homemade custard creams beat Crawford’s?  On the day that I baked them they were a bit hard and definitely needed a good dunking.  They did improve with age though and, when my dad, a self-confessed biscuit addict, tasted them on day four they were good, dunked or not.  His (completely unbiased) verdict was that they gave Crawford’s a good run for their money.  I’ll take that.

Macaroons

I’ve just about recovered from my three attempts to make these little *?!!#*s

P1010783 (640x480)

After my second attempt came out of the oven riddled with cracks and wrinkles, and then stuck to the baking paper anyway I almost gave up.  My third and final attempt certainly didn’t produce brilliant macaroons, but at least I could tell what they were supposed to be.

The whole macaroon/macaron saga began with my husband’s decision to give them a go.  He bought a piping bag, a special baking sheet with macaroon-shaped holes, some hot pink gel food colouring and some freeze-dried strawberries for the purpose.

He followed James Martin’s recipe from Sweet – they’re macaroons in his book.  The recipe makes 60.  We didn’t want that many, so Jon decided to make half and proceeded to make my usual mistake of forgetting and adding twice as much of one ingredient (I’m not sure which one) as required.

He blitzed icing sugar and ground almonds in our tiny food processor that is really a spice grinder, and then whisked some eggs whites to soft peaks.  He added caster sugar to the egg whites and whisked until the mixture was smooth and glossy as per the recipe, added a few drops of the hot pink gel and folded in the almond and icing sugar mixture.  He wrestled it all into a piping bag, swore a bit, piped it into the macaroon-shaped holes and let it sit for a while.  James Martin says that you need to leave macaroons for at least half an hour if you want a smooth crust.

They went into the oven at 180° (without the fan) for 10 minutes. They came out looking pretty good – although you couldn’t tell that there was anything hot pink in the mix.  They were smooth and shiny and looked like macaroons are supposed to look.   He couldn’t get them out of the holes on the baking tray though.  We had to scrape them out with a spoon and they broke under the pressure.

I decided to have a go.  I’m the one with the baking blog after all.  I used Edd Kimber’s macaron recipe from Patisserie Made Simple.  Given my success with Edd’s Flan Parisien, I had high hopes.  My macarons were going to be smooth, shiny and hot pink and would peel off the baking paper like a dream.

Here they are. P1010776 (640x480)

Not smooth, not shiny, and not hot pink.

I started the macarons by mixing ground almonds with icing sugar.  The recipe does tell you to use a food processor, but also says that mixing the sugar and almonds together with a fork is fine.  I mixed with a fork. I just thought it seemed easier to do it that way.  No wonder I ended up with lumpy macarons.  Next, I added egg white to the almond and sugar mixture and made a paste.  The two recipes couldn’t really be more different.

Edd Kimber uses Italian meringue for his macarons.  This involves making a syrup with water and caster sugar and pouring it into soft-peaked egg whites once it reaches 118°. Tricky.  One hand keeping the sugar thermometer off the bottom of the pan, the other holding on to the KitchenAid to prevent lift-off as the whisk reached the mind-blowing speed of level 6.  Somehow, I managed to get the syrup safely into the egg whites, and keep the KitchenAid on the worksurface and whisking until the bowl cooled down.  I added the remainder of the hot pink gel (a teaspoon and a bit) and ended up with a thick, glossy and pink meringue mix.  So far so good.

I added the almond paste and started to mix it into the meringue using a wooden spoon.  The recipe says that the batter should fall off the spoon in a thick ribbon, which should then be absorbed back into the mixture leaving only a faint trail behind.  It would have taken me years to get to this stage with my wooden spoon.  I put everything back into the KitchenAid with the beater and mixed.  It still took ages until the thick ribbon was absorbed back into the mixture, and I’m not sure whether I mixed for long enough or too long.

I piped the mixture into rounds on baking paper – no fancy macaron baking trays for me – and left them.  I’m not sure how long for. It could have been half an hour, it could have been longer.  I got side-tracked and completely forgot to check the time.  Anyway, when I came back to them, they had developed a skin and weren’t sticky so I put them into the oven.

I did use the fan, and baked them at 160° for about ten minutes.  As you’ve seen, they were some distance from my shiny, smooth, hot pink ideal.

I’m not sure why I felt I needed to make another batch, but I decided to give the James Martin recipe a go in a final attempt.  I made sure I had the correct quantities of everything.  I carefully made templates on baking paper.  I blizted the icing sugar and almonds in the food processor.  I added a good slug of pink food colouring (the old-fashioned type from a bottle this time) and then some more to my meringue mix.  I folded in the almonds and made sure that the mixture was silky smooth before I put it into the piping bag.

I didn’t quite keep to my circle templates.  The mixture was too runny and came out of the piping bag in a constant stream.

P1010775 (640x480)

I left the macaroons for around an hour and a half, and then baked them at 160° fan for ten minutes.  They were smoother than my first batch, but a lot of them had cracks on the surface.  They weren’t that pink either.  I started to think that macarons/macaroons weren’t worth the effort whatever you called them.

I was in two minds whether to make a filling to sandwich the macaroons together.  My original plan was to make a posh strawberry-flavoured buttercream with egg yolks and sugar syrup (from Patisserie Made Simple), but, to be honest, I was running out of steam.  I had a cup of tea and decided to make the stuff.  I’d come this far (twice) so I should at least try to finish what I started.

I dissolved some caster sugar in water (without stirring) and heated the syrup to 120°.  In the meantime, I whisked egg yolks in the KitchenAid and, when the syrup hit 120, I poured it in.  I did lose some of the syrup which crystallised against the side of the bowl.   It’s quite a job to pour it in while the whisk is still whizzing around.  Once the mixture had cooled, I added unsalted butter.  I added the freeze-dried strawberries for flavour, and also the very last of my pink food colouring (the buttercream was pretty yellow and just wouldn’t go with the disappointing salmonish colour of the macaroons).  My buttercream ended up yellowish pink.  Not great.

I turned to the macaroons which had been cooling on the baking paper. They wouldn’t come off.  They were soft and flabby all the way through.  Not cooked enough I suppose.  I managed to sandwich two together for a photo callP1010778 (640x480)


but the rest had to go into the bin.  Terrible.

I did say that was my final attempt, and I was sure that it was, but I woke the next day to find that my baking mojo was back.  I was going to make a decent batch of macaro(o)ns.

The children were at home, so I couldn’t risk the Italian meringue method.  118° sugar syrup, an out-of-control KitchenAid and potty accidents all at the same time just didn’t bear thinking about.

This time I not only blitzed the almonds and icing sugar into the food processor, I also sifted them twice.  I whisked my eggs until they were a little bit stiffer than in my previous James Martin attempt and I didn’t spend as long folding in the almond mixture.  I didn’t use any food colouring in this batch.  I piped the mixture onto baking paper templates using a freezer bag – I couldn’t face washing up our reusable one again – and left them for an hour and a half.  I baked them at 160° for ten minutes and, this time, I had recognisable macaroons.  I left them on baking trays to cool and them sandwiched them together with the buttercream.  Phew.

P1010783 (640x480)

They tasted OK, nice and soft in the middle.  The buttercream was a bit funky though.  It had a bit of a slimy texture, maybe because of the sugar I lost on the side of the bowl, or perhaps the eggs weren’t whisked enough before the sugar syrup went in.  I wouldn’t recommend freeze-dried strawberries either.  Never mind though.  I’ve made macaroons .  I won’t have to do it again.  

Bake Off Biscotti

I had a slow start to my baking day this week.  It was raining and getting the children to nursery took hours.  I blame two things;  one, Peppa Pig and the delight a three-year old takes in jumping into every puddle, shadow of a puddle, and anything that may or may not have been a puddle in a former life, and, two, snails.

“Snail,” yelled Naomi every time we saw one (and there were dozens).  I heard her the first three times and we stopped to watch the snails having a chat on the wall.  I’d developed selective deafness by the time we reached the fourth snail and started pushing the buggy a bit faster.

I got home (without jumping into any puddles, or doing any snail watching) and, continuing my Great British Bake Off theme, started on my Biscotti for Biscuit Week .  They’re not something I would usually make.  To be honest, I’ve only ever bought them as very last-minute Christmas presents when I can’t think of anything else to buy.  There are two biscotti recipes in the Great British Bake Off Big Book of Baking; praline biscotti and lemon.  I went with lemon.  It was only one spoon on the difficulty scale, but I was a bit wary of this because the Bake Off on Wednesday evening they seemed pretty complicated to me.

The first step was to make the biscotti mixture.  I put some softened, unsalted butter into the KitchenAid and beat it until it was creamy.  Then, added caster sugar, lemon zest and almond essence and beat the mixture again.  I slowly added two eggs, sifted in plain flour and baking powder, and mixed in some lemon juice.  Now, this is where watching the Bake Off came in really useful.  The recipe says that, as soon as the flour is worked in, you should get your hands into the bowl to bring the mixture together.  Left to my own devices at this point, I would have added a lot more flour, because the mixture I had was really sloppy.  Having watched the Bake Off, and seen how wet the contestants’ mixtures were, I left it as it was.

I lined a baking tray with baking paper and, as per the recipe, scattered almonds over it (a departure from the Bake Off biscotti, where the contestants worked nuts and other lovely stuff into their mixture before shaping it).  I floured my hands and tried to get the mix into a rectangular shape.  I couldn’t pick it up in one piece because it was so wet, so I tipped it out of the bowl onto the baking tray and tried to shape once it was on the tray.  The recipe says that the rectangle should be around 30x9cm, and 1.5cm thick.  I think my rectangle may have been a bit wider and thinner.  It was very sticky and rough around the edges.

I put the tray in the oven at 160° fan.  The recipe says that the first bake should take between 30 and 35 minutes, and the biscotti block should be golden brown and firm to the touch.  I kept a careful watch, because, on television, they said that the block should be just set so that the biscotti didn’t burn during the second bake.  My biscotti mix seemed to be set  golden after just 23 minutes, so I took it out of the oven and then started to worry that it was underdone.

001

The recipe says that the block needs to cool for five minutes before it’s cut into biscotti shapes.  The Bake Off advice was that it needed to be cold before it was cut so that the biscotti didn’t crumble.  There was a lot of wafting going on in the tent on Wednesday.  The contestants had a strict time limit which I could never have kept to.

Once my biscotti block had cooled (I gave it a lot longer than five minutes), I cut it into biscotti shapes.  The recipe says I should have had twenty four biscuits.  I had twelve long ones.  Should have made my rectangle thicker.  I put the biscotti cut-side up onto a baking sheet and put them into the oven at 150° fan for 25 minutes.  I left them to cool and made some icing from icing sugar and lemon juice which I drizzled over the biscuits once they were cold.  This is the end result.

004

Taste-wise, they were fine, although the almond flavour didn’t really come through.  They did, alas, lack that all-important snap.  The absence of a crunch could have been down to many things.  Perhaps the mixture was too wet.  Maybe the first bake wasn’t long enough – I don’t know.  Mary and Paul would have raised their eyebrows, shaken their heads sadly, and moved on.


Biscuits for cheese

Something I’ve been thinking about trying for a while are biscuits for cheese.  Is it possible to beat a plain Jacob’s cream cracker by something homemade, and, if it is, is it worth it?

I found a few recipes for biscuits that were good with cheese; savoury digestives, oat biscuits, biscuits with seeds, cheese flavoured biscuits.  In the end, I went with the plainest, Farthing Biscuits, from the Great British Bake Off, Big Book of Baking.

The biscuits weren’t difficult to make.  I sifted plain and self-raising flour, a teaspoon each of salt and caster sugar into a bowl and added cubed butter and lard.  I added an extra pinch of salt to make up for the fact that the recipe required slightly salted butter and I didn’t have any.  I used my brilliant pastry blender to get to bread-crumb stage.  Here it is again.004I brought the mixture into a dough with iced water.  The recipe was spot on as to the amount I’d need (about 90ml) which is pretty rare.  I made the dough into a ball, wrapped it in clingfilm and put it into the fridge for 15 minutes.  Once rested, I rolled out the dough.  It was supposed to end up a bit thinner than a pound coin.  This took up a lot of worktop space.  My dough almost fell off the edge of the table twice.  Anyway, after shuffling things around a bit I got there and  cut out my biscuits.  The recipe calls for an 8.75cm round-edged cutter.  Mine is only 7.5cm, so, as expected, I ended up with more biscuits than the, “about 22” stated in the recipe.  I managed 34, and cooked them in three batches.

The next stage in making a farthing biscuit is to prick it all over.  The Big Book of Baking says that you can use a biscuit-pricker to do this. Oddly enough, I don’t have one so I made do with a fork.  This was the most challenging part of the recipe.  You need a steady hand and, after a rather large glass (or perhaps two) of Tio Pepe, mine was steady-ish at best (it was Saturday night).

After pricking, the biscuits went onto greased baking trays and into the oven at 160° fan.  The recipe says that they should cook between 15-16 minutes, and that the biscuits should be firm and cooked through but not coloured (although the biscuits in the picture in the Big Book of Baking are definitely biscuit coloured).  My biscuits took about 20 minutes and came out of the oven looking much thicker than in the picture.  Here are some of the finished articles. 003

They may look a bit pale and unexciting but, with a thick smear of butter and a chunk of gorgonzola, they were really good, very light and crumbly and with a slight savoury taste that went well with the cheese.  My dad and aunt disagreed, but that was after they had pinched a couple and started dunking them in their coffee.  They were time-consuming to make though, so on the question of whether making biscuits for cheese is worthwhile, I think the answer has to be yes, but only if you like baking and have a bag or two of time to spare.


Delia’s Florentines

After the Prinsesstårta last week I wanted to be started and finished in the small window created by Naomi’s afternoon nap and Matthew’s trip to the supermarket (I was baking on a Saturday  because of a night out with Take That – or as Gary Barlow said – what’s left of them, in the week). I plumped for Delia Smith’s Florentines, as something I may have bought for a gift but, pre-Let’s Bake the Books, wouldn’t have attempted myself.

I read the ingredients list carefully to make sure that I wasn’t going to be ambushed by any extra preparation (as has happened in the past).  I needed butter, golden caster sugar, plain flour, double cream, whole almonds (cut into slivers), ready-flaked almonds, candied peel (chopped), glacé cherries (chopped), angelica (finely chopped) and dark chocolate.  Hold on a minute, angelica?  I had to google it.  It’s a herb, a bit like parsley, and when it’s candied it can be used to decorate cakes.  Thank you BBC Good Food.  So, basically, the green shiny bits on Florentine biscuits are made of candied angelica.  As suspected, I couldn’t find any in Tesco.  Marks and Spencer didn’t have any either.  I vaguely remembered cakes decorated with green glacé cherries as a child, and, if all angelica did was to add a bit of green to my biscuits, perhaps they would do.  I couldn’t find any of those either so decided to go ahead without anything green.

I heated butter and sugar in a saucepan until the mixture melted and then added double cream.  I had a bit of a shock when everything fizzed and bubbled up like a Hogwarts’ potions practical gone wrong.  Surely Delia should have warned me.  Anyway, I kept stirring and added the rest of the ingredients except the chocolate as per the recipe.  Once everything was incorporated, I let the mixture cool down a little, then put teaspoonfuls onto a lined baking tray.  It was only when I’d put them in the oven (for 10 minutes at 170° fan) that I realised that I’d forgotten to put the flour in.  I was supposed to heat it along with the sugar and butter at the very beginning.  Perhaps that explained all the fizzing that went on when I added the cream.  I decided to give my poor flourless Florentines their allotted time in the oven before trying again.  I did have some trouble shifting them onto wire racks when I took them out of the oven, but, all in all, they didn’t look too bad.

I had enough ingredients to try a second batch and, after presiding over a three-minute stint on the naughty step (Matthew was back),  I put butter, sugar and flour into a saucepan.  I  managed, as I quite often do, to squeeze the flour bag at precisely the wrong moment, and ended up with twice as much flour as I needed.  I shovelled the extra back into the bag with a teaspoon, trying to avoid the sugar.  If the children complain that the next macaroni cheese I make tastes funny I’ll understand.

So, the recipe says that you have to stir the butter, sugar and flour over a low heat until it has melted.  I wasn’t really sure about this. Does flour melt? Was I supposed to have a completely liquid mixture? I seemed to have been stirring for ages so I put the cream in.  This time I didn’t get any fizzing.  I kept stirring.  Delia says that this is to keep the mixture smooth.  Mine wasn’t completely smooth but it was smoothish, so I added the rest of the ingredients, let it cool, put teaspoonfuls onto baking trays and put them into the oven.

The floured Florentines did keep their shape better than the flourless ones and, when they came out of the oven, they were much easier to handle.

I let them cool, then melted some dark chocolate to cover the base of the biscuits.  They were a bit holey, so I put kitchen roll under the wire racks to catch the drips, and coated the Florentines with chocolate.  I let the chocolate cool before attempting to make a wavy line across them with a fork.  I couldn’t manage it.  I don’t know whether the chocolate was too warm or too cold, but I simply could not make a wavy line.  I made do with a spiral-type pattern which, I think, looked fine.  Here are the final Florentines (with and without flour).  They looked pretty good, even without the angelica.107

Taste-wise, I thought they tasted  slightly burned, especially in the Florentines with flour.  Jon said he thought that they were the best thing I’d made since I started the blog.  That was on Saturday night.  On Sunday he had another one (or two) and said that he’d changed his mind.  “Perhaps the mixture wasn’t consistent”, he said, “either that or I was a bit drunk”. I wonder which.

Garibaldi Biscuits

This week  I needed to make something from the store cupboard that wouldn’t take too long. We were going away, and I hadn’t yet made my pilgrimage to Boots to buy a load of toiletries in small bottles.  I decided to make Garibaldi biscuits from Delia Smith’s Cakes.  The biscuits didn’t look as though they would be too difficult to make (I know I’m supposed to be making tricky and terrifying things, but I came across the recipe and just wondered whether it would be worthwhile baking Garibaldis, or whether they’re best left to McVities).

The biscuit mixture was easy; self-raising flour, salt and butter rubbed together to look like breadcrumbs, breadcrumbs mixed with golden caster sugar, and enough milk to make a firm dough.  I rolled the dough out to form a rectangle that was roughly the 20cm x 30cm required by the recipe and sprinkled currants over one half.  I folded the other half of the dough on top and rolled it again.

Now, I thought I’d been pretty generous with my currants, but, on rolling the dough out for a second time, I found that, not only had I been a bit stingy, but unevenly stingy.  I was going to end up with some currantless Garibaldis – which probably means that they wouldn’t be Garibaldis at all.  Just Baldies perhaps?001

I trimmed the dough and cut it into neat Garibaldi-sized fingers.   The recipe says that it makes 24 biscuits.  I made 5 extra biscuits with the offcuts.  They weren’t particularly neat or Garibaldi-sized.

I put the biscuits onto a tray lined with baking paper, brushed them with egg white and sprinkled granulated sugar over the top. They went into the oven at 180 degrees fan for 15 minutes.  This is how they came out.

005

The uneven spread of the currants meant that two of my biscuits turned out to be Baldies, and some weren’t as curranty as they should be but they tasted OK. Buttery and sweet, and the currants (in the biscuits lucky enough to have any) were soft and added a really good fruity taste (and they didn’t stick in my teeth, which is always a bonus).

I couldn’t find any McVities Garibaldis in Tesco, so I bought a packet of Tesco’s Own to compare homemade with shop-bought.  We liked the homemade biscuits better.  My husband said that they were more buttery, and that the Tesco biscuits tasted a bit burned.  It was all about the fruit for me.  I thought that the currants in my biscuits tasted better than Tesco’s.

I’m not sure whether I’ll make these again.  They were tasty, but, to be honest, I think that there are nicer biscuits that can be made just as easily.  If I did make them again, I’d be a lot more generous with the currants so that I don’t end up with any more Baldies.

Linzer Biscuit Love Hearts

To celebrate Valentine’s Day I thought I’d make some heart-shaped Linzer biscuits from the Hummingbird Bakery’s Home Sweet Home recipe book.  Here they are, all 61 of them (the recipe says it makes 25).

007The glut of biscuits had nothing to do with the Hummingbird’s recipe and all to do with lack of preparation (more of which later).

Making the dough for the biscuits was pretty easy.  I creamed sugar and a lot of butter together and thanked God that the KitchenAid was in working order this week. Then I added flour, cinnamon, and ground almonds.  The recipe suggests that, once the dough comes together, you halve it, wrap each half in cling film, and put it in the fridge to rest for half an hour.

Unfortunately, I had more prosaic things to do this week than indulge in several catch up episodes of Home and Away (see my post on Eccles cakes for details of my Aussie soap addiction).  Things like descaling the toilet and unblocking the drains.  No wonder life at the Summer Bay Caravan Park seems so attractive.

Toilet descaled and drain unblocked (and hands thoroughly washed), I took the rested dough from the fridge.  The next step of the recipe is to roll out the two halves of dough to a thickness of 4mm between two pieces of baking paper and, once again, chill them.  Now, I’m not sure how big the pastry boards or the fridges are in the Hummingbird Bakery’s tester kitchen, but it was really difficult to get the thickness (or, more accurately, thinness) required and keep the dough on the board (my boards are 45.5cm x 29cm).  I ended up with overhanging edges that fell off when I moved the dough into the fridge.

Since making the biscuits, I’ve given this problem a little bit of thought, and if I made them again, my solution would be to forget about dividing the dough and, after the first resting period, roll it out between the baking paper but onto a work surface and then put something cold on the top (like the ice packs for the inside a cool bag). Alternatively, I suppose I could live dangerously and forget the second resting period altogether,  but who knows what impact that would have on taste and texture etc.

So, I had my two lots of dough all rolled out and chilled.  This was when my lack of preparation hit.  I discovered that the tin of assorted cutters that I bought for the doughnut cupcakes only contained very small ones.  The recipe requires two heart-shaped cutters, one 8cm at its widest point and, the other, 5cm wide.  The largest heart-shaped cutter I had was just about big enough for the hole in the top of the biscuit.  I made one biscuit bottom and one top by cutting around the shape of the cutter about 2cm from the edge. I quickly decided that that method just wasn’t going to work.  It required a level of precision and delicacy that was simply beyond me.

Cutting by hand just wouldn't work

Cutting by hand just wouldn’t work

I decided to make more, smaller, biscuits using my teeny-weeny cutters. By the time I got to the sixtieth pair of hearts I was just about frazzled, and I’d bent my cutter out of shape so my  bottoms had started to go wonky.  I gathered my unused dough into a ball and put it into the fridge, right at the back. My little boy could use it to make a dinosaur or something.

Given their size, the biscuits took less time to bake than the recipe says. They were cooked in around 8-10 minutes.  They cooled, I put them in a tin overnight and sandwiched the tops and bottoms together with warmed seedless strawberry jam the next day.

005

They did look very cute.  So much so that I put them on a cake stand to show them off and they went a bit soft.  Luckily, my children liked them, and my mum and dad were staying for a few days so they didn’t have time to get much softer.

I have a couple of tips for next time:

  • I’ll make sure I have the right equipment before I start to bake.  That way I’ll either be able to go and get the right stuff, or adapt the recipe.
  • No matter how cute the biscuits may be, they’ll go straight into a tin to prevent sogginess.

I think I will make these biscuits again, but only once I have a bigger and less bendy heart.  Happy Valentine’s Day.