White chocolate and cranberry cupcakes

I was feeling a little more festive this week so, to celebrate, I made some cranberry and white chocolate cupcakes from Hummingbird Bakery, Home Sweet Home (I’m not quite at the mince pies and yule log stage yet).  I realised that I hadn’t made cupcakes for the blog since my very first post, doughnut cupcakes, also from Home Sweet Home, so it was about time I tried a second batch.

I decided to make half the recipe.  Hummingbird recipes are usually pretty generous quantity-wise and Jon and I are trying to cut down a bit on our cake consumption.  The recipe was for twelve.  After halving the quantities, I ended up with nine.  So much for trying to cut down.

I started with the sponge.  I mixed softened, unsalted butter, plain flour, caster sugar, baking powder and salt in the KitchenAid until my mixture looked like breadcrumbs.  The KitchenAid is very, very wobbly these days. It’s getting to the stage where I have to keep a very close eye on it, even on the slowest of speeds.  I wonder whether Santa is reading…

I mixed milk and an egg together in a jug and, slowly, poured half of the liquid into the dry ingredients with the KitchenAid on slow.  I turned the speed up a notch, keeping a very tight grip on the mixer to prevent it leaping off the work surface.   Once I had a smooth batter, I slowed the machine down again and added the rest of the liquid.  Finally, I mixed in dried cranberries (the recipe didn’t specify, but mine were sweetened) and orange zest.  My mixture was pretty wet.  I poured it, rather than spooned it, into my cake cases which immediately folded in on themselves inside the muffin tin.  Oh well, I suppose the beauty of cupcakes, especially Hummingbird cupcakes, is that they are covered with so much buttercream that you can’t really see that the cupcakes themselves are a bit wonky.

They went into the oven at 150° fan.  The cooking time in the recipe is for between 20 and 25 minutes.  I checked them after 20 and they did need that extra five.  I would, usually, have taken a picture at this stage but the children were around and I had to referee a dispute between Daddy Zombie and Zombie Elsa.  Something to do with access to the Ice Palace apparently.  Anyway, once that particular tiff was sorted out, I’d completely forgotten about photographs.

I made buttercream to top the cakes by mixing sifted icing sugar and softened butter.  I added some milk, and then, bracing an arm against the KitchenAid, mixed on a high-speed until the buttercream was light and fluffy.  I added some melted white chocolate and mixed some more.

I topped the cupcakes with the buttercream and decorated them with dried cranberries and a sprinkling of orange zest.  Very festive they looked too.

cupcakes-resize

Actually, they looked more festive than they tasted.  I wasn’t really surprised because, to be honest, the only cranberry I usually eat at Christmas is in a sauce served with the turkey.  They were good though,  a light and fruity sponge topped with lovely white chocolate buttercream.  The cranberries were all at the bottom of the cakes, but with cakes as small as these, I don’t think it matters too much.  A good start to my festive baking.  Who knows, I may even feel up to mince pies next week.

Banana Muffins

I know, I know.  I should be cooking up a festive storm at this time of year. Last year it was pumpkin pie for Thanksgiving, and Delia’s Christmas stollen. I have started the Christmas cake and puddings, but since I can’t get my teeth into them yet, I can’t tell you how they’ve turned out.

I decided to make some muffins before there’s absolutely no excuse for going all Christmassy.  Not very adventurous for an adventurous baking blog I know, but I do find muffins tricky.  They never turn out particularly well, and my last two batches of banana muffins had to be thrown away. I made a plea to Delia Online and the Hummingbird Bakery for help.

The lovely people at Delia Online pointed me in the direction of their tutorial video all about making muffins.  I watched it very, very carefully and decided to use Delia’s method, and a recipe for banana and cinnamon muffins from The Hummingbird Bakery Cookbook. A bit of a gamble, since it was the Hummingbird recipe that ended up on the patio feeding a flock of sparrows and a couple of rather fat pigeons.

The Hummingbird Bakery recipe is for twelve muffins.  I decided to halve it.  If it didn’t work, there’d be less to throw away, and, I always find the Hummingbird recipes pretty generous.  I’d probably end up with at least eight (in fact, I made ten – I’ve never had a muffin from the Hummingbird Bakery itself.  They must be enormous).

The first tip in the video is to make sure that you have all of the ingredients weighed out and ready to go before you even think about starting to mix.  I don’t tend to do this when I’m  baking, but this time I was going to obey Delia to the letter.  Everything was measured, my butter was melted, my muffin tin lined.  Ready to go.

Now, it seems as though the key to making a muffin rise is a double sift. Delia sieves the dry ingredients, then mixes the wet ones plus sugar separately and then sieves the dry ingredients for a second time into the wet ingredients.  This is different to the Hummingbird method which doesn’t tell you to sieve at all.

I sieved plain flour salt, baking powder, bicarbonate of soda and cinnamon into one bowl and, in another, I mixed caster sugar, egg, buttermilk, vanilla extract and melted butter (the Hummingbird recipe puts the sugar in with the flour at the beginning, and adds the melted butter once the wet and dry ingredients have been mixed).

I then sieved the flour mixture again onto the top of the sugar/egg/buttermilk mixture and folded it in really quickly.  Delia says that you shouldn’t mix for more than 15 seconds and, taking heart from the lumpy, floury mixture in the video, I too stopped at 15.  Here’s what the mixture looked like.

It was very lumpy, and there were its of unincorporated flour dotted all over the place, BUT, if Delia says that this is OK, then it must be.  I folded in some mashed banana, put the mixture into my muffin cases, and sprinkled some sugar over the top.  I baked them at 150° fan for about 25 minutes.

The double sift and quick folding really worked.  Here are the final muffins.

muffins

They looked like proper muffins and tasted just as a banana muffin should.  None for the birds from this batch.  Thank you Delia.


Mary Berry’s Quick Boiled Fruit Cake

It’s been cold this week, and suddenly, the world seems much scarier.  The answer to a chill in the bones and the feeling that you want to hide under your duvet?  Cake.  A big, solid fruit cake.  The kind that wouldn’t look out of place on Marilla Cuthbert’s table at Green Gables when the Minister came to tea.  Something homely and reassuring.  A cake that says, “everything’s going to be fine.”

I wanted something that wouldn’t take too long.  I didn’t want a cake that I’d have to feed with booze every day for a week before I could cut into it – I’ll save that for Christmas.  I found a recipe for a quick boiled fruitcake in Mary Berry’s Baking Bible.  It shouldn’t take long if the title was anything to go by, and the boiled fruit bit sounded interesting and very Marilla Cuthbert-like.  I decided to give it a try.

The first step was to heat a can of condensed milk, butter, raisins, sultanas, currants and glacé cherries in a pan until the butter had melted.  Condensed milk.  My parents love it.  They say they used to have it on sandwiches.  A condensed milk sandwich?  I can’t quite see it myself. Would you butter the bread first?  How would you cut it?

Anyway, once the butter had melted, I brought the mixture to the boil, simmered for five minutes, then took it off the heat and left it to cool.

I mixed self-raising flour, cinnamon and mixed spice in a bowl, added eggs and the fruit mixture and stirred.  Not well enough I’m afraid, since when I put the batter into my cake tin, there was unincorporated flour all over the place.  I gave it another quick stir while it was in the tin.  Not a step that I’d recommend.

I baked the cake at 130° fan for an 1¾ hours.  It was supposed to be well risen, golden brown, the top should be firm, and a skewer inserted into the middle should come out clean.  I had three out of four (my cake was conker coloured rather than golden brown, but it had been that way for most of the cooking time).  I took it out of the oven, let it cool in the tin for a few minutes and then turned it out.

Here it is

quick boiled fruit cake


It’s a really good fruit cake this.  It doesn’t take too long to make, it isn’t difficult, it’s packed with fruit and warm spice, and it tastes good.  A really comfy cake to see us through these really dark November days.

Savarin – a second attempt

I’m very behind in my attempts to bake the technical challenges from the Great British Bake Off. It finished last week and I’m still stuck in Tudor week.  I’ve decided not to attempt the jumbles. I know it would take me hours of shouting and swearing to get my biscuit dough into knots, and knots that tasted of throat sweets at that.  No thanks.

On to the savarin then.  I have tried to make a savarin before, a chocolate and almond liqueur one.  It was a disaster.  Worse even than my Battenberg.  I had to throw it into the bin.  Even the birds wouldn’t touch it.   I wasn’t feeling very confident about making another, but I thought I should at least give it a try.

I used the recipe from the Great British Bake Off website , although it’s also available at BBC Food.  Both recipes are accompanied by pictures of beautiful savarins.  They’re filled with cream and elegantly decorated with fresh fruit and caramel shards. The Bake Off version even has a little chocolate disc with the word “savarin” on it, just in case there’s any confusion.  I was a bit pressed for time, and I wasn’t really in the mood for fancy piping and caramel, so I made mine plain and served it with cream.   Unsurprisingly, I didn’t make a chocolate disc that said “savarin” either.Savarin

It’s a poor cousin to the beautiful Bake Off creations, I know, but it all came out of the tin in one piece, it was cooked and it tasted beautiful.  Who needs caramel shards and a chocolate label?

The first step in the recipe was to put plain flour, sugar, instant yeast and salt into a bowl, and then mix in eggs and milk.  I’d decided to use dried active yeast rather than instant so I had to activate it first which I did by mixing my yeast with warm milk and sugar (taken from the recipe amounts).  There were two reasons for my yeast choice.  First, I’ve had better results in making enriched dough when I’ve used dried yeast and, second, the recipe called for 10g.  I only had 7g sachets of instant yeast and I didn’t want to have to use two.  I left my yeast, milk and sugar mixture by the radiator for twenty minutes to bubble up and, once I had bubbles, I mixed it in with the flour, sugar and salt and added the rest of the milk and eggs.

The recipe tells you to beat the mixture for five minutes until you get a thick, sticky batter.  So here’s a question. Was I supposed to beat with a beater, or a dough hook?  Was I making a cake mixture or a dough?  A bread, or a cake? I know my previous savarin experience wasn’t great, but I checked that recipe (which came from the Great British Bake Off Big Book of Baking) and used the dough hook.  My thick, sticky batter looked like this.

savarin batter

The next step was to add butter.  As per the recipe, my butter was at room temperature and in cubes.  I added them slowly.  It took ages.  When, at last, I had a mixture that could pass as smooth, elastic and shiny as required by the recipe, I folded in orange and lemon zest, covered the bowl with clingfilm and left it by the radiator to rise.

While my savarin mixture sat by the radiator, I made a syrup from water, caster sugar, lemon juice and lemoncello – (the recipe uses Grand Marnier, but we hadn’t got any).  I also did my usual chores,  the ironing, catching up on a bit of Home and Away… My savarin was rising for a more than an hour.

When I went back to it, I poured the mixture into a greased ring cake tin, re-covered it and put it back by the radiator.  The recipe says that it should stay there for 45 minutes.  I had a school pick-up and junior tennis before I could get back to baking.  It took a lot longer than 45 minutes.

Back in baking mode, I put the savarin into the oven at 160° fan for 25 minutes (checking after 20).  The dough had split at the bottom (Google says that this could be a sign that the mixture was under-proved) , but it was golden brown and sounded cooked when I tapped it.

baked savarin

I left it to cool in the tin for a few minutes, then, with my heart in my mouth (this is where my earlier attempt started to go pear-shaped) I very carefully loosened the sides with a palette knife and turned it out of the tin.  It came out in one piece.  I did a very small victory dance around the kitchen, poured half of the lemoncello syrup into the cake tin, and put the savarin back in to soak it up.  I put the rest of the syrup into a roasting tray and turned the savarin over so that it could soak up the rest of the syrup from the bottom.

As I said, I didn’t fill it with cream, but I did whip up some double cream with icing sugar and vanilla paste, and served the savarin with a generous dollop.

Savarin


It tasted lovely.  I was so pleased.  The dough was rich and sweet and had soaked up the syrup really well (although a couple of my tasters thought that there was a bit more syrup at the bottom than the top).  I don’t think I’ll ever be an expert in all things enriched-dough, but I am getting better.  I’ll definitely try this sort of thing again.  I may even make a bit more of an effort in the presentation.  Chocolate labels though?  I doubt it.

Mary Berry’s Marjolaine

“Bakers, you have three hours,” said Sue Perkins at the start of the technical challenge for dessert week on the Great British Bake Off.  Three hours.  I started making Mary Berry’s marjolaine at 9.30am and finished just as An Extra Slice started on BBC 2,  twelve hours later.  True, I did take a bit of a break to pick the children up from school and nursery, but I still took half a day longer than the allotted Bake Off time.

I used the recipe from the Great British Bake Off website, but it’s also available on BBC Food, The Bake Off site says that this is one for the super-organised multi-tasker.  That’s not me. Sometimes it’s a struggle to focus on one thing, any more and I start to go slightly mad (I wasn’t always like this, I blame the children).  Anyway, the marjolaine…

p1020034

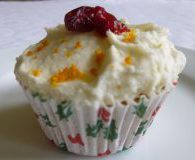
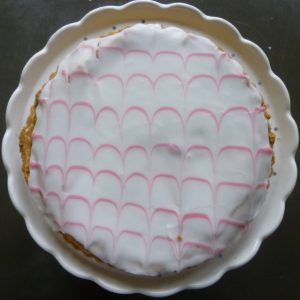
Here is it.  At 9.30 on Friday morning though, this was a long,  long way in future.

I started by grinding almonds and hazelnuts in our teeny-tiny food processor.  There were a few big pieces left in the grinder, but it had started to overheat, so I took them out and ate them.  I didn’t want to risk them in the meringue.  I know it’s supposed to have a bit of a bite, but I didn’t want to break anybody’s teeth.  I spread the nuts onto a baking tray and put them in the oven at 160° fan for about 12 minutes.  I used the twelve minutes to wonder whether I could have used ready ground almonds, and whether it would have been OK to roast the nuts before grinding them.  I put the nuts into a bowl and, once they were cool, I added caster sugar and cornflour.

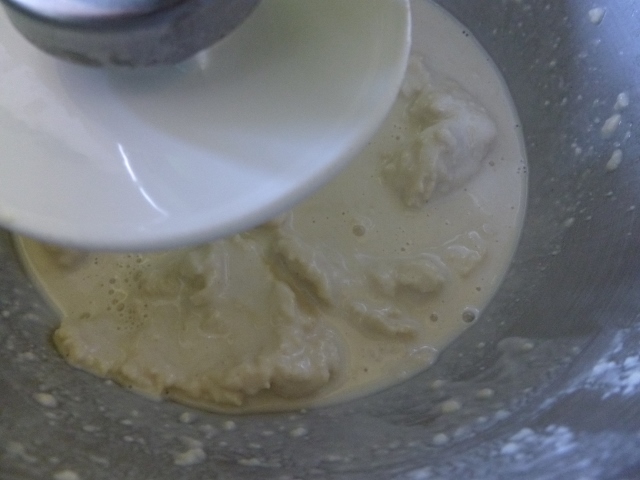
Next came the meringue.  I whisked some egg whites in the KitchenAid until there were frothy, then I cranked up the speed and added caster sugar tablespoon by tablespoon until the mixture was thick and glossy.

meringue
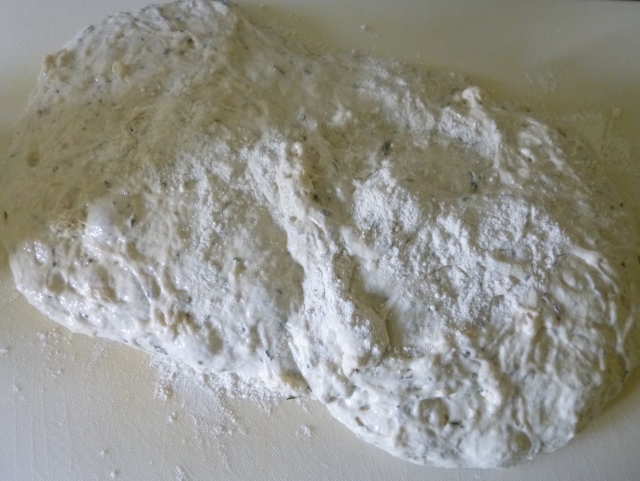
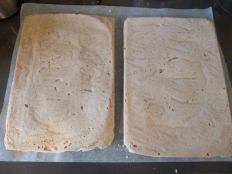
I folded the nuts, sugar and cornflour mix into the meringue and  divided the mixture between two Swiss roll tins.  The recipe says that the tins should be 30cmx20cm.  Mine are a little bit bigger.  It didn’t really matter, I had enough meringue to comfortably fill them both.  They went into the oven at 130° fan.  I checked them after 45 minutes.  They were supposed to be lightly golden and firm to the touch.  Mine didn’t seem that golden, but they were certainly firm.  A bit on the crisp side even.  Oh well.  I opened the oven door and left them to cool.

While the meringues were in the oven I made the ganache.  Does this count as multi-tasking?  I put some dark chocolate into a bowl. I had some trouble with percentages of cocoa again.  The recipe called for 46% cocoa solids.  This is Tesco’s own plain chocolate.  The only thing was, I hadn’t bought enough.  I had to make a quick trip to our nearest shop (an Asda garage) to get some more, and they only had Green & Blacks 70%.  Perhaps this is why, when I poured hot cream over the top, it didn’t really melt.  I had to put it into the microwave.  Probably a terrible sin in the baking world.  I decided that, since it was, mainly, going into the middle of the cake, it wouldn’t really matter that much.  Nobody would care whether it was glossy or not, as long as it was edible and tasted of chocolate.

Next for the praline to go into the praline buttercream.  I toasted some blanched almonds in a frying pan.  The kitchen, by this time, smelled absolutely lovely.  Chocolate, toasted nuts.  Delicious.  I then put caster sugar and water into a pan and heated it.

I bought a sugar thermometer for my very first post on Let’s Bake the Books, my doughnut cupcakes, and I know I’ve complained about not being able to hold the thermometer and swirl the sugar simultaneously, because the clip that holds the thermometer onto the pan is too high so I have to hold onto the thermometer all the time.  I found out this week that, guess what?  The clip moves.  I can move the clip up and down to fit my pan.  I’ve said before that I’m not an unintelligent person, but sometimes I do start to wonder.  Anyway, I dissolved the sugar in some water, swirled it around the pan a bit and waited for it to reach 170°.  Once the mixture hit the magic number, I took it off the heat, tipped in the almonds, gave it a bit of a stir, and poured the mixture onto a lined baking tray.

almond brittle I waited for it to cool, broke it up and blitzed it in the food processor.

On to the buttercream.  The buttercream in the recipe is for French buttercream where you whisk up eggs yolks, pour in sugar syrup, and then add butter.  To me, this seems like a multi-tasking nightmare in itself.   I have tried to make this type of buttercream before with very poor results.  The sugar syrup solidified on the side of the bowl, and the buttercream ended up with a really slimy texture.  Anyway, I manhandled the KitchenAid as best I could across the kitchen and put it next to the hob.  I put it onto the slowest speed and started whisking my egg yolks.  I clipped my sugar thermometer onto my pan and dissolved sugar and water and heated to 115° (soft ball stage).  Once there, I poured it quickly, and with as much precision as I could manage, into the bowl of the KitchenAid and whisked until the bowl was cool. Then I whisked in some softened butter.  I did a taste test and it was fine.  Much better than my last attempt. I folded in the praline, tasted again and it was very good.  Very good indeed.

This was where I left for school pick-up.  I came back to the task of assembly a couple of hours later feeling refreshed and ready to go.

Assembly started with the meringues.
meringues for marjolain

I cut them both  in half lengthways.  There was a bit of breakage, but nothing too drastic.  I put the most stable slice onto a very long serving plate (usually only used for carrots at Christmas dinner) and spread a layer of the buttercream over the top. I put another meringue slice on top and topped that with a layer of ganache (which had to be microwaved again so that it was thin enough to pipe).  Another layer of meringue and buttercream went on top of that, followed by the final meringue slice.  I covered the cake with the remaining buttercream and covered the sides with toasted flaked almonds.  This was a job and a half.  I  got covered in buttercream, and the almonds didn’t stick very well at all.  Finally, I piped chocolate ganache around the edge of the cake and parallel lines over the top and filled the sections with pistachios and flaked almonds (I was supposed to use chopped hazelnuts, but I didn’t buy enough so I used almonds instead.  I had a big bag of them).

marjolaineThen, I treated myself to a rather large gin.

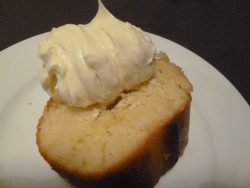
The marjolaine was enormous and impossible to eat in anything other than huge slabs.  Here’s one of them.

marjolaine sliceI was pretty pleased with how the cake turned out.  I think the meringue may have been a bit on the dry side, but it tasted really good.  Very chocolatey, very nutty and very indulgent.  Make it again though?  I’m not sure I have the time.

Fougasse Fiasco

I knew that making fougasse, the technical bake from Botanicals Week in the Great British Bake Off, wasn’t  going to be easy.  I’ve never been great at making bread of any sort and, after the disastrous baguette I made during the last Bake Off, I was tempted to give up completely.  I think perhaps I should have.

I used the recipe for my fougasse from BBC Food .  The first step was to put strong white flour, fine salt and instant yeast into a bowl.  Here was my first question:  What’s fine salt?  I could see that it would be different to, say, the sea salt that comes snowflake size out of the packet, but was it different to table salt?  I didn’t have time for a trip to the supermarket anyway, so table salt had to do.

I added olive oil and, as per the recipe, three-quarters of the recipe amount of water.  I mixed it with the KitchenAid on slow (you don’t very often see the Bake Off contestants making bread in a mixer I know, but the recipe said use a mixer and I was more than happy to comply).

Now, here’s where I think I went wrong.  According to the recipe, when the ingredients start to come together you add the rest of the water very slowly, crank up the mixer to medium speed and mix for eight minutes.  My mixture came together so I started to add the water.  I realised that I wasn’t completely sure how I should do this.  I don’t think of myself as a particularly stupid person, and I know what slowly means, but in a dough-making situation I wasn’t quite sure what I was supposed to do. Should I add the water in one slow stream, or add it gradually and make sure that it was all absorbed into the dough?  I decided to go with the first option.  It fitted the recipe best. Here’s what I ended up with.  Not particularly promising.

fougasse dough I turned up the speed on the KitchenAid and mixed for the required eight minutes.  At that stage, the dough should have been very elastic and it should have stretched away from the side of the bowl.  It didn’t. It took a lot longer than eight minutes to get anywhere near elastic, and it was still really, really wet.  I wasn’t sure what to do.  Should I mix longer? Should I add some flour?  Should I trust the recipe and use the wet, sloppy mess that I had, and hope that it would improve with proving?

I gave the dough a few more minutes in the KitchenAid (it must have had at least fifteen in the end), then mixed in some rosemary and thyme – the recipe also called for fresh sage, but I hadn’t been able to find any.  I put the mixture into two plastic containers to prove.  I wasn’t supposed to use two containers, but the Bake Off contestants had been given one large square one and I didn’t have one big enough.  OK I do have plastic bowls that are big enough, but I thought that the shape might be important.  I left the dough to prove until it had doubled in size.  This was much longer than the hour stipulated in the recipe.  It always is.

When I came back to it, I dusted the work surface with flour (I was supposed to use semolina as well, but the stuff in the cupboard that I thought was semolina turned out to be polenta, and I wasn’t sure that it would work).  The dough ran out of the containers onto the surface.  The recipe said that it would be “quite loose and flowing” at this point, so I didn’t despair as the lava-like mass spread out onto my work surface.  At least I tried not to.  I just about managed to divide it into two and, using a lot of flour, managed to make two oval-ish shapes which I put onto baking trays that I’d lined with baking paper.fougasse dough unshaped The next step was to make cuts in the dough so that it resembled a leaf.  My dough wasn’t having any of it.  It was too wet.  I made a cut and my free-flowing dough mixture filled up the hole again.  I gave up.  I put the baking trays into plastic bags and left them for twenty minutes.

I came back to this.

shaped fougasse I didn’t have holes, it’s true, but there were a couple of small indentations.  It was better than I expected.

According to the recipe, the final step before baking was to spray the fougasse with olive oil and sprinkle them with oregano.  I do have a spray bottle, but it’s dedicated to vinegar for cleaning the BBQ, so I drizzled and sprinkled, rather than sprayed.  I put the fougasse into the oven at 200° fan and baked them for twenty minutes.  When they came out, I brushed them with more olive oil and sprinkled them with salt.  Here’s what they looked like.

FougasseThey tasted dreadful.  Hard on the outside, rubbery in the middle.  Straight into the bin.  I think I know where things went wrong, but any advice from any of the bakers out there would be really gratefully received.  In the meantime, I shall take comfort in the botanicals I know and love best.

gin and tonic

Bakewell Tart

The technical bake for pastry week on the Great British Bake Off, Mary Berry’s Bakewell Tart, caused a controversy (according to The Sun anyway).  Should bakewell tarts be iced or topped with almonds?  Should bakewell tarts that are iced (like the ones Mr Kipling bakes) really be called cherry bakewells?  What about tarts that are iced but don’t have a cherry?

The Great British Bake Off recipe had icing – pink feather icing at that – but no cherry.   Bakewell tart, cherry bakewell, or something in between? Whatever it was, I gave it a go.

I made the raspberry jam for the filling, and the pastry in advance.  As I said when I made the dampfnudel, I have absolutely no idea how the Bake Off contestants manage to make anything in the time they’re allowed.

For the jam, I put raspberries in a pan with jam sugar and put it over a low heat until the sugar dissolved, I upped the heat and boiled the mixture for four minutes.  I’m still not quite sure of “jam temperature”, I think there is a  test that involves putting some jam onto a saucer and seeing if you get wrinkles.  A four-minute boil worked for the Viennese whirls so that’s what I did (without a wrinkle test).

To make the pastry, I mixed plain flour and cold butter with my brilliant pastry blender.  Here it is yet again.

001Once I’d got to breadcrumb stage, I sieved in some icing sugar and added a beaten egg.  The recipe says that you should also add two tablespoonfuls of cold water.  I decided to add the egg first, then mix.  If the pastry came together I wouldn’t need the water.  I didn’t.  In fact, I was a bit concerned that using the whole egg might leave the pastry a bit on the wet side.  Too late to do anything about it now though.    I worked the pastry into a ball, wrapped it in clingfilm and put it into the fridge overnight.

To make the tart, I rolled out the pastry to the universal tart thickness of a pound coin and lifted it very carefully over my tart tin.  The recipe stipulates a 23cm tin.  Mine is 24cm, but looks a lot shallower than the  Bake Off tins, so I thought I should have enough pastry.  I did.  There was plenty, which was a good thing because I had to do the odd bit of patching up.

bakewell tart pastry caseThe Bake Off recipe is silent on whether the case should be trimmed pre or post-baking.  I consulted James Martin’s Sweet on the matter.  He’s a post-bake trimmer, so I decided to do the same.  I put the untrimmed tart onto a baking tray – well, actually a pizza tray because I don’t have a baking tray big enough – lined it with scrunched up greaseproof paper, filled it with baking beads, and baked it blind for 15 minutes at 200° fan.  After the 15 minutes, I took out the beads and put the tart back into the oven for another five minutes.  I trimmed the edges when it came out.

To make the filling, I creamed together butter and caster sugar, added ground almonds, almond extract and an egg, and mixed it all up.  My jam had set nicely.  I spread a layer onto the bottom of the tart and put the almond mixture onto the top.  I used all of the filling, mainly because I couldn’t think of anything exciting to do with any leftovers.  It was probably because my tin was shallower than that used in the recipe, but my filling did end up a little bit higher than the edges of the tart.

Filled but unbaked bakewell tart I put it into the oven and crossed my fingers that it wouldn’t overflow.

The cooking time in the recipe is between 25 and 30 minutes or, as always, until a skewer inserted into the centre comes out clean.  Oh, and you also have to remember to turn the oven down to 180° fan.  It took a long time for my tart to cook.  My skewer was covered in raw tart at 25 minutes, at 30 minutes, at 35 minutes…  I didn’t think it was ever going to cook.  I took the tart out eventually at 40 minutes or thereabouts.  I still wasn’t sure whether or not it was done.

cooked bakewell tart

I could certainly see the advantage of icing.  I had quite a few cracks to hide.

Once the tart had cooled, I made the icing by mixing icing sugar and water.  I put a few tablespoons into a separate bowl and coloured it pink (I used red gel food colouring – I think you can get it in pink but they didn’t have any in Tesco this week).  I transferred the pink icing to a piping bag.  Since the Viennese whirls, my last piping disaster, I have googled “how to fill a piping bag.”  Google recommended putting the bag into a jug and opening it out over the top.  I followed Google’s advice

filling a piping bag

and the icing ended up at the bottom of the piping bag rather than all the way up to my elbows. It’s obvious really I suppose, but thank you anyway Google.

I covered the tart with a layer of white icing and piped parallel lines of pink icing over the top. I pulled a cocktail stick through the white lines and

finished bakewell tart

here it is.  I think my feathering needs a bit of work, bit, all in all, I was pretty pleased with this one.  The pastry was light and crisp – no sign of a soggy bottom, the jam was lovely and the filling tasted as almondy as a bakewell tart should taste.  I don’t really care whether I made a bakewell tart, a cherry bakewell, or something else entirely, it was lovely and something that I’ll definitely try again.

Dampfnudel

I’d never heard of dampfnudel before they appeared as the technical challenge on the Great British Bake Off bread week. Even the ones Paul Hollywood produced looked insipid.  I only decided to try them because he promised the taste of an iced bun.

I didn’t have very high hopes that my dampfnudel would work.  I’ve tried iced buns and no end of sweet doughy stuff and none of it ever seems to turn out very well.   On top of this, the Great British Bake Off website says that they are, “incredibly difficult to bake.”  What had I let myself in for?

I have to admit that I did cheat a bit.  First, I didn’t knead by hand.   Everything went into the KitchenAid, and the dough hook did all the work.  Second, I used a lot more time than would have been available to the brave Bake Off contestants.  I have absolutely no idea how they make anything in the time they’re given.  Third and fourth, I didn’t make the fruit sauce or the custard.  I still had some jam left over from the Viennese whirls.  That would have to do.

I put strong white flour into a bowl and added caster sugar to one side and instant yeast to the other. I added milk, eggs and butter and stirred until the mixture came together.  The recipe says you should do this with your fingers.  I used a spoon.  I kneaded it in the KitchenAid for about eight minutes.  The dough is supposed to have a soft, smooth skin when its had enough kneading.  I’m not exactly sure what a soft, smooth skin looks like on dough, but my mixture did seem pretty smooth, so I left it at eight minutes. I added lemon zest and gave the dough a few more turns in the KitchenAid.  I put the mixture into a bowl, covered it with cling film and left it to prove.  The recipe says for about an hour, or until doubled in size.  My dough was nowhere near doubled in size in an hour.  In fact, by the time it had (at least two hours later), I had to go and pick Matthew up from school, so my dough doubled in size, then had another couple of hours before I could go back to it.  Would it be overproved?  Would anybody notice?

When I returned to the dough, I knocked the air out, carefully divided it into twelve equal pieces and rolled them into balls.  They were a bit on the “informal” side, as Mary Berry would say, but they’d have to do.

I made the poaching liquid (butter, milk and sugar, heated until the sugar has dissolved) in a pan, put the buns in and left them for fifteen minutes.  The recipe doesn’t say whether the lid of the pan should be on at this stage.  I put it on on the basis that, when you’re leaving something to prove, you do usually cover it up.  My buns expanded nicely in the fifteen minutes proving time, and, I’m pleased to say, retained a lot of their informal charm.

I put the pan over a medium heat on the hob (we have an induction hob and I put it at level four – that seems like medium to me, although I’m never sure).  I gave them the full thirty minutes as per the recipe, and then a further eight without the lid.  They turned out looking like this.

dampfnudel

They weren’t particularly photogenic, but they did have the required caramelised bottom that you can’t really see on the picture, and they tasted really good.  I was very pleasantly surprised. They were like teacakes (the afternoon tea type, not Tunnock’s) and were lovely with the Viennese whirl raspberry jam.  They may look like a very poor, anaemic  cousin of the iced bun, but, compared to all the other disasters I’ve had with sweetened dough, taste and texture-wise they stand out a mile.  I may even try them again one day.

Viennese Whirls

I did have good intentions when I said I was going to bake the technical challenges from the Great British Bake Off.  I started well with the jaffa cakes, but it has taken me a few weeks to catch up with Mary’s Viennese whirls  and the dampfnudel.   I don’t think I’ll be attempting lacy pancakes any time soon.  I can’t really see the point.

Anyway, Viennese whirls, here they are.

Viennese whirls

I really didn’t think they’d be too much trouble.  A bit of jam making, a bit of piping.  What could go wrong?

I started by boiling raspberries and jam sugar together.  I didn’t have a thermometer to tell me when the mixture hit jam o’clock, so I followed the recipe and boiled it for four minutes.  I poured it into a bowl and left it to cool.  It might set.  It might not.  I had no idea.

Next, I drew some circles on baking paper as templates and started on the biscuit mixture.  I softened unsalted butter in the microwave.  I left it a bit too long.  It was definitely on the melting side of very soft when I took it out.   I didn’t fancy starting again so I put it into the KitchenAid with some icing sugar, draped a tea towel over the top to avoid an icing sugar cloud and beat the butter and sugar together until the mixture was pale and fluffy.  I added plain flour and cornflour and mixed again.

Now for the piping.  Piping is not and, I don’t think ever will be, one of my baking strengths.  I did invest in some disposable piping bags after my last piping disaster, but I still ended up with an overflow of biscuit mix that oozed over the top of the bag, down my arms and onto the kitchen table.

I had a terrible time piping my biscuits onto the templates.  I don’t think my piping nozzle was big enough, and I got stringy, stingy, looking blobs.  The mixture was supposed to make twelve whirls – so twenty-four biscuits.  I had an awful lot left over.  Instead of beefing up my twenty-four biscuits, I made extra.  I also whirled from the outside in.  I’m not sure where I’d left my head.  It certainly wasn’t in the kitchen.  My Viennese whirls looked pitiful.

Viennese whirl mixtureI baked them for 15 minutes at 170° fan.  They came out looking very sad and thin.

Once they’d cooled I sandwiched my thousand and one biscuits (I didn’t have quite that many, but it did feel like it) with the raspberry jam and buttercream which I made with butter, icing sugar and vanilla extract.

I’d tried a couple of the biscuits before making the jam and buttercream sandwiches. They tasted overdone and had a sandy texture.  I wasn’t looking forward to doing a final taste test. Perhaps this one would best be left to the children and husband.

You know what though?  They were completely transformed by the filling.  True, they were nowhere near the melt-in-the-mouth Viennese whirls that Mr Kipling makes, but the jam and buttercream masked the imperfections in the biscuits well enough.  I may try making them again one day, but only when I’ve sorted out my piping problems.

Mary Berry’s Great British Bake Off Jaffa Cakes

The Bake Off is back, and my goal for the series is to bake the technical challenges.   First off then, Jaffa cakes.  Their appearance on cake week must have put an end to any discussion of whether they’re cakes or biscuits.  Here’s what I ended up with.

jaffa cakesI found two Bake Off related Jaffa cake recipes online.  The first from BBC Food, and the second from The Great British Bake Off site itself.  They were slightly different.  The BBC recipe made half the amount of sponge as the Bake Off recipe, and it used dark chocolate with 36% cocoa solids, whereas the Bake Off recipe used chocolate with 46%.  I decided to make the quantity of sponge from the Bake Off recipe, but, otherwise, go with the BBC.

Now, I’ve had trouble finding dark chocolate with only 36% cocoa solids before.  When I made Mary Berry’s chocolate marbled ring cake I ended up using Tesco’s cooking chocolate, and even then the percentage was too high.  I decided to see what Google had to say about plain chocolate, and guess what.  It’s Bournville.  36% plain chocolate is Cadbury’s Bournville.  I know there’s no advertising on the BBC but couldn’t they have given us just the smallest hint?

Off I went to Tesco to get the Bournville.  They didn’t have it.  I went to Marks, and the two proper sweet shops in Leamington.  No luck.  There was single estate chocolate with 75+% cocoa solids, chocolate with chilli, with salted caramel, with lime.  No Bournville anywhere.   I headed back to Tesco for another bar of its cooking chocolate and, on the way, passed Poundland.  Would Poundland have any?  I decided to give it a try.  There it was.  Piles and piles of it.  My 36% chocolate problem has been solved forever.

The first step in the Jaffa cake recipe was to make the jelly.  You make up a pack of orange jelly with a lot less water than usual, add some orange zest and pour it onto a baking tray to set.  My baking tray was a bit bigger than the size specified in the recipe, so I was a bit worried that my jelly would be a too thin.  I didn’t worry about getting the jelly off the tray until I tried it.  Jon pointed out that the Bake Off contestants had all lined their baking trays with baking paper or clingfilm.   I had thought about it, but didn’t.  If I’d needed a lining the recipe would have said so wouldn’t it?

Once set, my jelly was completely stuck inside the tray.  I ended up cutting my circle shapes out in the tin, peeling the left over jelly away and, very carefully, lifting the circles out with the help of a palette knife.  Some of them split, but most were OK.  They were going to be hidden under chocolate anyway.

After making the jelly, I moved onto the sponge.  I whisked up egg and sugar with an electric whisk.  The recipe says that the amount it so small that a whisk is better than a mixer.  I gave the mixture 5 minutes at top speed and ended up with a really light batter.  I spooned it carefully into my greased shallow bun tin and then noticed that my flour was still sitting in a bowl on the kitchen table.  I scraped the mixture back into my mixing bowl and folded in the flour, hoping that the butter from the bun tins wouldn’t ruin the mixture.  I spooned it back into the tin again and popped it into the oven at 160° fan.

jaffa cake mix in bun tinThe sponges were done in the 7 minutes stipulated by the recipe.  I let them cool in the tin for a few minutes, then turned them out onto a wire rack.  I had enough sponge mix left over to make six more.

I put my beautiful Bournville chocolate over a pan of simmering water to melt and played a bit of air guitar (I’d got as far Experience Hendrix on my ipod marathon, by far the coolest thing on there so far).  Once it had melted, I started to assemble the Jaffa cakes.  I’d already cut out my jelly circles, and I lifted them onto the top of the sponges.  An extremely fiddly task.  I managed it in the end, but with lots of ripped and concertinaed jelly circles that wouldn’t impress Mary Berry one bit (neither would the swearing that accompanied my attempts to slide them off the knife).

Now back to the chocolate.  It wasn’t cool enough and started to melt the jelly as I spooned it on.  I stopped, played a bit more air guitar, unloaded and reloaded the dishwasher and came back to it.  I spread the chocolate over the top of the cakes and make the required crisscross pattern.

Here they are.

finished jaffa cakesThe chocolate wasn’t very shiny, and the sponges were paler than the McVities version which I obviously had to buy as a taste comparison.  They were very nice though.  More cake-like than McVities and they had a more orangey orange flavour, if that makes sense.   McVities Jaffa cakes are good, Mary Berry’s are better, but, honestly, they were so fiddly to make that I don’t think I’ll be trying again.  One thing though.  Cadbury’s Bournville.  What a revelation.  You can keep your single estate rich dark chocolate from now on.  I’m off to Poundland.