Kougelhopf

It seems like a very long time since I said I would bake a kougelhopf to try out my new bundt tin.  It is.  I’ve been well and truly side-tracked by things like half-term and a chronic attack of I-really-can’t-be-bothereditis.  I think the rain brought this on, and the fact that I bought a new face cream that’s advertised by Helen Mirren (I don’t have anything against her at all, it’s just that she’s quite a bit older than me and I hadn’t quite prepared myself for moving up the skin cream age bracket just yet).  I also had a moment where I seriously considered buying some of that caffeine shampoo that’s advertised to the forty-something woman in a whisper.  No wonder the sofa and back-to-back episodes of Home and Away seemed more appealing than a day in the kitchen.

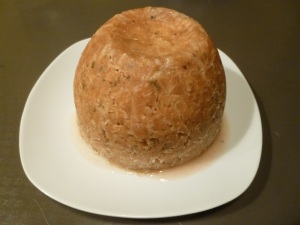
Anyway, I did eventually make a kougelhopf.  Well, I tried to.  I didn’t end up with a proper one, just a heavy, ring-shaped cake/bread kind of thing.   It did get eaten though, and I haven’t been put off having a second go (although not just yet).

I know where I went wrong.  I’ve attempted several enriched dough breads/cakes for Let’s Bake the Books and I’ve had more failures than successes.  I made three batches of hot cross buns, for example, and none of them turned out tasting like hot cross buns should.  I had better luck with a brioche Christmas garland and, to be honest, by the time I’d tackled a savarin (for the second time), I thought enriched dough would no longer pose any problems.

A kougelhopf you say?  I could make one with my eyes closed.

I could have made a successful kougelhopf (I hope), but I was lacking in two key ingredients. Time and patience (actually, I don’t think I can honestly blame lack of time – I’m sure, if I was more organised, I’d have plenty.  It was lack of patience that did it).

I used a recipe from Edd Kimber’s Patisserie Made Simple.  The bundt tin I was using was a small one.  I agonised for a few minutes about whether I should make half the recipe, two-thirds, three-quarters… I decided that the best thing to do would be to go with half.  It was the easiest mathematically and my maths has never been great.  Maths combined with complicated dough making and I’d be done for.

Edd Kimber’s Kougelhopf recipe is a two-dayer.  On day one, I made the dough.

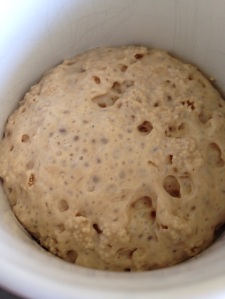
First, I activated my yeast – the recipe uses fast-action dried yeast – I do have some but, to be honest, I’ve had my best enriched dough results when I’ve used the stuff you have to activate first.  I dissolved my yeast in some milk with a bit of sugar and left if to bloom.  Bloom it did. Here it is.

In the meantime, I heated some raisins in a pan with a mixture of rum and water until the liquid had been absorbed.  These would go into the dough once it had been mixed.

I added my yeast to a combination of plain and strong white bread flour, caster sugar and salt and mixed in the KitchenAid with the dough hook.  I added eggs and mixed – the recipe doesn’t give you the option of hand mixing (which I never do, but always feel that I should – good on you Edd Kimber for going straight to the food mixer).

This stage of the kneading process, says the recipe, should take at least ten minutes from when the dough first forms, and that it’s ready when it is smooth and elastic.  I’m never quite sure when I get to that smooth and elastic stage. I think my mixture could have done with a bit more kneading but I was a bit pushed for time, so I stopped at the prescribed ten minutes.   I kept the KitchenAid running as I added room temperature butter a little bit at a time and then kneaded as per the recipe for another fifteen minutes.

This time, the test for whether the dough had been kneaded enough was that it shouldn’t stick to the side of the bowl.  I had a bit of a problem here.  The dough would leave the side of the bowl and stick around the dough hook, but then it would migrate back into the bowl, sit there on the side for a while, then cling to the dough hook again.  This kept happening.  I had no idea whether the dough was ready or not.

I added raisins and orange zest to the dough, gave it another short mix, put it into a greased bowl, covered the bowl with clingfilm, and put it into the fridge to rise slowly overnight.  Day one complete.

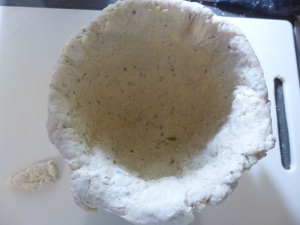
The first step on Day Two was to grease my bundt tin and sprinkle almonds into the bottom. Easy.   Then I was supposed to take the dough from the fridge, give it a quick press, form it into a round, make a hole in the middle and put it into the tin.

I took my dough out of the fridge and found that a thick skin had formed on the top.  Should I have pressed the clingfilm onto the surface of the dough to stop this?  This is what you have to do with custard.  I checked the recipe.  It wasn’t particularly clear, but it hadn’t said anything about the dough developing an elephant hide overnight.  I took it out of the fridge.  It was too cold to do anything with.  I couldn’t press it, I couldn’t make it into a round, or make a hole in the middle of it.  I think I should have let the dough come up to room temperature, or at least warm up a little bit.  As I’ve said though, I didn’t display much patience with my kougelhopf dough and I fought it into the tin, skin and all, and flung it into a warm place to prove.

Now, the recipe says that the dough should double in size, and that this should take about two hours.  You can tell when it’s ready when you press it with a lightly floured finger and the dough springs back slowly.  I forgot to put flour on my finger so, when I did the test, I came away with a very sticky dough-covered finger and I wasn’t sure whether the spring back had been slow enough.  It was slow enough for me, I decided.  It had to be because, if it wasn’t, I wouldn’t be able to put it into the oven before I had to leave for school pick-up and that would mean that it would be another few hours before I’d have the chance to bake it.

I put the kougelhopf into the oven at 160° fan for thirty minutes (the recipe says thirty-five, but I was concerned that, since I was only baking half of the recipe, my cooking time would, perhaps, be shorter.  The top of the kougelhopf was also turning from the golden brown it should be to dark brown).

I left the cake in the tin for five minutes and then turned it onto a wire rack.  Some of it stayed in the bundt tin, but I did manage to get it out stick it onto the top of the cake (sort of).  I was supposed to brush melted butter over the kougelhopf, but I hadn’t read this bit of the recipe, so I dotted some unmelted butter around the top and had a quick look around the kitchen drawers for my pastry brush.  I didn’t find it (although I did find a pair of scissors that I’d been looking for for weeks),  so I used a knife to spread the butter around a bit and, once the kougelhopf had cooled down, I dusted it with icing sugar (which covered up my multitude of mistakes).

As I said, what I ended up with wasn’t a kougelhopf.  It hadn’t risen half as much as the one in the picture in Patisserie Made Simple, and the dough was dense and chewy (although not inedible).  The poor thing suffered from lack of love and attention on my part.  I think the moral of the kougelhopf is that it should only be attempted where time isn’t an issue and, if you think it’s passed the “is the dough kneaded enough?” and the “has the dough proved enough?” tests give it a few more minutes, just to make sure.



Hummingbird Homework

After my trip through my archives last time with my Top 5 Bakes, I’m very glad to say that my baking mojo did come back.  I went to New York, found N.Y. Cake (among other things) and bought myself a bundt tin.  I got back and opened Edd Kimber’s Patisserie Made Simple at Kougelhopf.

Enriched dough, a funny shaped tin, and the challenge of working out how much mixture I’d need to fill it (it says it’s for a six cup cake – very American and very confusing), what could be more adventurous?  Then my son came home with his latest homework project.

He’s learning about fairy tales at the moment and, this week, he had to make something to go in  Red Riding Hood’s basket to take to Grandma. A vast improvement on the poster he had to make last week to explain why he liked his favourite fairy tale.

“What is your favourite fairy tale?” we asked

“Rumpelstiltskin.”  We raised out eyebrows.

“What is it about Rumpelstiltskin that you like?” we asked. The betrayal, we wondered, the slavery, attempted child abduction, forced marriage (although perhaps I’m being a bit unfair to the Brother’s Grimm here. They did say that the miller’s daughter – they didn’t even bother to give her a name – had fallen in love with her captor, the King.  Perhaps we’re looking at the very swift onset of Stockholm syndrome rather than forced marriage, but even so…)

“I like the bit where Rumpelstiltskin gets so angry he jumps up and down on the floor and breaks it.”

It was that simple.

Anyway, back to Red Riding Hood.  I snapped Patisserie Made Simple shut. My kougelhopf was doomed.

“What do you want to bake for Red Riding Hood?”

“White chocolate chip cookies.”  This was a relief.  The last time my son expressed a desire to make biscuits only custard creams would do.

We went with a recipe from The Hummingbird Bakery Cookbook.  The recipe was for white chocolate and pecan nut cookies but, because Matthew wanted to take some to school, and because the school is nut free, we couldn’t use the pecans.  We doubled up the amount of chocolate instead.

We washed our hands, gathered our ingredients, and started by creaming unsalted butter with caster sugar and light brown sugar in the KitchenAid.

My trusty assistant measured the sugar into the bowl and I stood by with a teaspoon to get the extra 25g out before it touched the butter (perhaps I’m being a bit harsh here, since I often have to do this when I’m baking by myself, but why not blame a five-year old when you have the chance?)

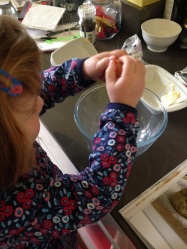
We held onto the KitchenAid as it beat the butter and sugar together until it was light and fluffy, and then Matthew added eggs – he’s pretty good at egg cracking.  It’s very rare that we have to fish any bits of shell out of our cake mix these days.  

We turned the KitchenAid on again and added some vanilla extract.

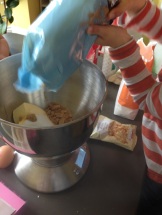
We stirred in plain flour, salt and baking powder.  The recipe didn’t say anything about sifting, so we didn’t.  It also didn’t say whether we should use the mixer, so we didn’t.  We both had a good go with a wooden spoon and, eventually, we had cookie dough.  Matthew and his sister added the white chocolate chips, carefully reserving enough to keep them going until snack time.

After incorporating the chocolate chips, the recipe says that you should divide the dough into two, make two rolls of between 15 -18cm, wrap them in clingfilm and put them into the freezer.  Our dough was a bit sticky and I knew that trying to shape them and then put them into clingfilm wouldn’t work, so we dumped our mixture directly onto the clingfilm and shaped them once they were wrapped up.

We put the two rolls into the freezer to set and went off to play – well Matthew went off to play.  I put the dirty bowls and things into the dishwasher.

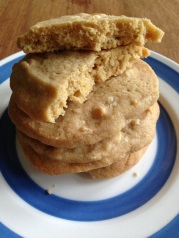
We came back to our cookie dough a couple of hours later.  I sliced it into discs and Matthew transported them across the kitchen onto baking sheets that we’d lined with baking paper.  I put them into the oven at 150°C and set the timer for 10 minutes (the recipes says they should take between 10 and 15 and be golden brown at the edges and quite flat).  I didn’t think they were done at ten minutes and, in the end, I gave them about 18.  I should have had faith in the Hummingbird though because the cookies were a bit on the crispy side once they’d cooled down.

They tasted fine, sweet white chocolate and vanilla, tempered by a tiny bit of salt.  Very nice.  Matthew took a few to school and we’ve had no complaints – at least none so far.

Next week,  kougelhopf.   I promise.

My Top 5 Adventurous Bakes

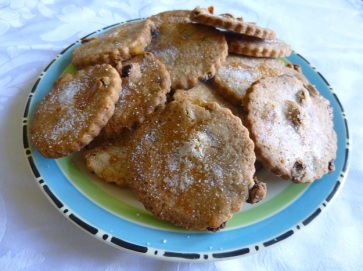
I feel terrible.  My blog is supposed to be about baking the adventurous.  What did I end up making for Easter?  A batch of biscuits.  OK, they were from the ‘Fancy Biscuit’ section of Mary Berry’s Baking Bible but they didn’t either look that fancy or taste that great and, according to my dad, their dunkability was also questionable.

easter biscuits

They were hot cross bun flavoured biscuits, and, to be honest, who wants a hot cross bun flavoured biscuit when they could have a a real hot cross bun?

Given that my baking hasn’t been particularly adventurous for a while, I thought I’d have a look at the exciting stuff I’ve made over the last couple of years to see if I could get my baking mojo back.

Here’s my top 5.

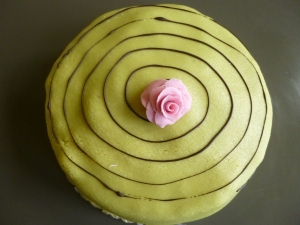
  1. My favourite cake was the prinsesstarta  I made from The Great British Bake Off, Big Book of Baking (the recipe is also available on the BBC Food website).  It was set as one of the technical bakes in the 2014 Bake Off series and, Good Lord, technical it was too.  It took three days and involved making custard, jam, green marzipan and fancy fondant icing flowers as well as a cake. How I managed to do it I don’t know, but I did and it really was worth it.

097

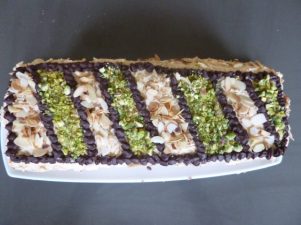
2. Mary Berry’s Marjolaine was another good one.  Another technical bake from    the  Great British Bake Off (Series 7 this time), and another twelve or so (worthwhile) hours in the kitchen.


marjolaine


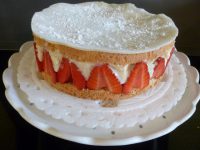
3.  In August last year, I attempted a fraisier from Edd Kimber’s Patisserie Made Simple.      It involved acetate so certainly qualified as adventurous.  I haven’t even opened Patisserie Made Simple for a few months.  It’s definitely time I went back to it.

final fraisier

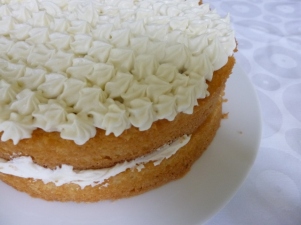
4. Although it’s a bit less adventurous, I think the coconut cake from James Martin’s Sweet has to be in my top five.  It didn’t take twelve plus hours of kitchen time, but it did taste absolutely lovely.  It would be easy enough to make again once the price of coconut oil comes down.

coconut cake

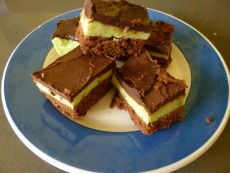
5.  Deciding on number five has been difficult.  I’ve been scrolling through my pictures remembering the trials and triumphs of the things I’ve made over the past couple of years.  I think I have to go with grasshopper slices from the Hummingbird Bakery’s Home Sweet Home.  The main reason I had for making these was that I was looking for something green because I was baking the jersey colours of the Tour de France (don’t ask).  It was either these or something green tea flavoured.  Green tea, or mint chocolate ganache?  A no-brainer.

210


So, there we are.  My top five Let’s Bake the Books adventurous bakes.  Have I got my baking mojo back?  I may have.  I can’t wait for a cup of tea and half an hour with The Books this afternoon, and that’s certainly a start.

Malteser cupcakes

I wasn’t planning on making anything special for Red Nose Day, but Maltesers were giving a fiver to Comic Relief if you baked something red with Maltesers on it and tweeted a picture.  I thought I may as well give it a go.

I have made a chocolate malt cake before, courtesy of the Hummingbird Bakery’s Home Sweet Home, but it was a three-sponger with extra chocolate fudge sauce and, given that I was going to be assisted in the kitchen again, I was going to have to make something simpler.

I decided to stick with the Hummingbird Bakery, because, when you’re making cupcakes, there isn’t anywhere else a sensible baker would go.  I used a recipe for chocolate cupcakes from Home Sweet Home, and added some Horlicks powder as well as cocoa for the flavouring.  I think I might be getting a bit ahead of myself here so, back to the beginning.

I mixed softened butter, plain flour, caster sugar, cocoa powder, Horlicks, baking powder and salt in the KitchenAid while my trusty lieutenant in the egg-breaking department (Naomi (3)) successfully cracked two eggs into a jug and mixed them very vigorously with milk.

She’s not too keen on the KitchenAid (understandably) so she disappeared while I poured half of the liquid into the dry ingredients and mixed on slow until everything was mixed together.  I cranked up the speed a bit (my KitchenAid still can’t go above level six without threatening to leap off the work surface) until I had a smooth batter, and then turned the speed down again and added the rest of the liquid.

I used a tablespoon to divide the mixture between twelve paper cases. The advice in Home Sweet Home is to use a 50ml ice cream scoop to fill your cake cases.  I don’t have one and, since I don’t make cupcakes that often (this is only the third time in the life of Let’s Bake the Books), or use one when I eat ice cream, I’m not going to buy one.   I knew there was a chance that I’d overfilled the cases, but I could live with it.

I baked the cakes at 150°C fan for 25 minutes.  I checked at 20 and they weren’t bouncing back when I touched them, so I gave them the full 25 as per the recipe.  I was right about over-filling the cases.  My cakes needed a trim before the frosting went on.

I let them cool down and tidied them up.  There were enough off-cuts to keep me going until dinner and beyond.  I wasn’t complaining.

The big three-sponge chocolate malt cake in Home Sweet Home uses a cream cheese frosting that’s enriched with double cream.  I decided to go with a plainer version from The Hummingbird Bakery Cookbook.  I sifted icing sugar into the bowl of the KitchenAid, added room temperature butter, threw a tea towel over the top to catch the icing sugar cloud burst, and turned it on.

Once the butter and sugar were well mixed, I added full fat cream cheese, held on to the mixing bowl (my mixer has been known to dislodge the bowl at higher speeds) and turned up the speed.  At this point I also added some red food colouring.  I wouldn’t usually have done this, but my cakes had to be red.  I had hoped that a few drops would be enough.  I should have known.  I used three whole tubes when I made a red velvet roulade and that still turned out brown.

A few drops weren’t going to be enough.  I put in a tube.  Still no good.  I opened another and emptied it.  Surely that would be enough bright red food colouring to make bright red frosting…

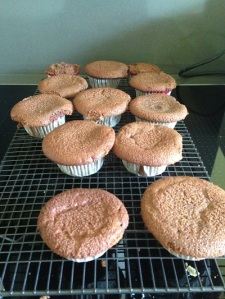
I covered my cupcakes in salmon pink frosting and handed them over to my decorator-in-chief, who gave them a very generous Malteser make-over.

Here’s the final version.

They were really good cupcakes, despite the colour.  They were chocolatey, maltesery, cream cheesy and just a little bit salty.  Salty may sound a bit odd in cupcake language but my husband says that it’s exactly why Hummingbird cupcakes are so good.  It’s the salt mixed with all the other lovely sweet stuff.   I have to say that I agree.  I don’t think three batches of cup cakes in my two years of blogging is enough.  I don’t think I’ll be making any more red ones any time soon though.

Follow my blog with Bloglovin

Scones

I’m still baking the basics and, this week, I decided to try to make some scones.  I say try, because I have attempted them before and ended up with biscuit-type things that tasted a slightly sconey at most.  Everyone (except my husband, who always tells it like it is when it comes to cake) was very polite about them, but when nobody could cut them in half to pile on the jam and cream that is the very essence of a scone, I knew I’d failed.

As usual, when I try to make something I’ve failed at before, I turned to Delia Smith.  I used the recipe for Rich Fruit Scones from Delia’s Cakes which is also available from the Deliaonline website.  I also had help this week from my little girl.  She’s three and was in charge of eggs…

…and mixing.

I sifted self-raising flour into a bowl, added caster sugar (the recipe uses golden caster sugar, but I didn’t have any) and, together with N, used my brilliant pastry blender to mix in softened butter until the mixture looked crumbly.  We did a pretty good job.

“We did it together like best friends didn’t we mummy?”  My heart melted.

I fished out a little bit of shell from a very well beaten egg and added it to the mixture along with some milk.  I wasn’t sure whether to add the whole recipe amount of 3 tablespoons at one go because, although I know that scone dough has to be quite soft, I didn’t want to have to work with something really wet.  My mom says that the best scones she ever made were from Mrs Beeton’s Book of Household Management.  She was making half of the recipe, forgot, put the whole amount of liquid in and ended up with a dough that she could hardly work with.  She couldn’t quite believe it when what came out of the oven was the perfect scone.   I might end up with really good scones, but I think I’d rather put up with something less-than-perfect than a pile of slop. Especially with a three-year old on the loose in the kitchen.

I was putting my trust on Delia though, and the recipe didn’t say anything about adding the milk in stages.  I decided to add it slowly.  This way, I could stop if the mixture started to look more milky than doughy.  In the end, I added a couple more tablespoons than the recipe amount – I think my egg may have been a bit on the small side – and brought the mixture together into a soft, but not sticky, dough as instructed.

I put some flour onto a board and turned it out.  I flattened, rather than rolled, the dough to a thickness of 3cm and cut out 5cm rounds.  I had nine scones.  I gave N the off-cuts and she made two rabbits.  We sprinkled flour over the top of them and baked them on lined baking sheets at 200ºC fan for 15 minutes.  I checked them by tapping the bottom.  You get a hollow sound once they’re cooked.

They came out looking like this.

I was pleased.  At least this time they looked like scones.  My mom said that there were really light and, although I put so much jam on mine, the scone taste was somewhat overwhelmed, it was still there.  I’ll definitely make them again for a treat on a rainy afternoon.  Oh, and N really enjoyed the whole baking and eating thing.  Something to try again. Strictly on bath days only though I think.

Mary Berry’s English Cherry Cake

It’s back to the blog this week after a bit of a break.  It’s been a time thing. Back in September I imagined that, with my little boy at school five days a week, I’d have more time for baking and photographing and writing about it.  Turned out I was being ultra-naive.  With a three o’clock pick up time, I don’t have time to make complicated things any more (unless I can spread them over several days) and taking photos has become really difficult, given that I have to be on the look out for the sticky fingers that are itching to “help”.

For the next few weeks, I’ve decided not to be particularly adventurous, I’m going to try a few of the more basic things in my books.  If I can make a fine marjolaine or fraisier surely I I’ll be able to manage a cherry cake, lemon drizzle or scones. Let’s see shall we?

I decided to start with a cherry cake.  I used a recipe for English cherry cake from Mary Berry’s Baking Bible.  I had all of the ingredients already so a trip to the shops wasn’t required.  What a relief after the expedition I’d had trying to find yuzu juice. The recipe also only had four instructions.  What could go wrong?

Step one:  I greased and lined my cake tin and put the oven on.

Step Two: I quartered 200g of glacé cherries, rinsed them, drained them and dried them with kitchen paper.  I knew that I had to dry the cherries really well to prevent them sinking to the bottom of the cake.  I had an inkling that I hadn’t done this well enough, but I had used half a roll of Bounty so I decided to stop.

Step three: I sieved self-raising flour and baking power into a bowl, added ground almonds, softened butter, caster sugar and eggs and beat everything together.  Mary Berry’s instructions say you should do this for a minute. She doesn’t say what you should do it with.  A wooden spoon, an electric mixer, the KitchenAid?  I don’t know why , but I used a wooden spoon and beat the mixture until my arm felt as though it was going to spontaneously combust – about 10 seconds.  I had a rest and carried on until I’d accumulated a minute of beating time.  Next time I’ll be using  electricity.

I folded in about two-thirds of the cherries (I was keeping some back to poke into the top since I wasn’t convinced they wouldn’t sink), and poured the mixture into my cake tin.  Once I’d put the rest of the cherries in, my cake looked like this.

Step four:  I put the cake into the oven at 140° Fan.  The baking time in the recipe was 1½ hours at the least, so I watched a couple of episodes of Home and Away and picked up my little boy from school before I checked it.  The cake was cooked but it had sunk in the middle and it looked like all of the cherries, even the ones I’d scattered onto the surface, had sunk to the bottom.  So much for going back to basics.  I double checked that I’d used self-raising flour and baking powder, instead of plain and bicarbonate of soda.  I had.

Mary Berry says that a cake may sink if you’ve put too much or not enough baking powder in (helpful), if the cake was taken out of the oven before it was cooked, or if the oven door was opened before it had time to set. It could also be that the mixture had been over beaten.  The cake was definitely cooked when I checked it, and I hadn’t opened the door at all during the cooking time – I was too engrossed in Home and Away.  I didn’t think that, given my struggle with the wooden spoon,  I could have over beaten the mixture either.  It must have been the baking powder.  Too much or too little I do not know.

Here’s a slice of the finished article.

I don’t think my cake would have got me through “cake week” on the Bake Off, but as a cake with cherries on the bottom it went down very well.  The kids and Jon loved it despite its imperfections.  Staying with the basics for a while might well be a very good idea.  I need the practice.


Apple cake with yuzu caramel (sort of)

It’s Bramley Apple Week this week, so I decided to make an apple cake.  The most adventurous one I could find in my books was an apple cake with yuzu caramel from James Martin’s Sweet.

I started off with a hunt for yuzu juice.  I’ve seen it on Masterchef and maybe the Bake Off, but nowhere else.  I didn’t think Tesco was likely to have any and I was right.  I thought Holland and Barret may come up trumps, but when I asked one of the assistants he just gave me a funny look.  I tried Marks – no luck, and then I thought about the oriental supermarket at the bottom of town. It didn’t have any yuzu juice, but it did have tinned lychees (something I’ve been looking for since last Valentines Day when I ended up making a coffee cake and not the super-pretty lychee and raspberry cake of my romantic dreams).

The only other positive thing about the yuzu hunt was that the journey to the far end of town would probably register about half an hour’s exercise on my Fitbit.  Ten minutes it gave me.  Ten minutes.  It credits me with more than that during martini hour* on a Saturday.  Pick up glass, lift to mouth, take a sip, return glass to table, repeat.

Anyway.  How could I make yuzu caramel with no yuzu juice?  I turned to the bloggers at Food Bloggers Central for help.  There was a consensus that some kind of citrus juice would work, and the recipe did say that yuzu tasted somewhere between mandarin and lime.  I didn’t have any lime, and I really couldn’t be bothered to hit the shops again so I went with mandarin by itself.

I made the sponge cake first.  There was no fat in it, just a lot of eggs creamed with soft light brown sugar with plain flour, baking powder, and grated apples folded in.  I put the mixture into a 23cm square tin and put it into the oven at 160° fan.  The cooking time in the recipe is 25 minutes. I’m not sure whether the oven temperature given was already a fan oven temperature (it said 180°), and I couldn’t find anything in Sweet that said anything about oven temperatures, but my cake took much, much longer than 25 minutes before it passed the skewer-in-the-middle-comes-out-clean test.  When I say much longer, I mean almost half an hour longer. Not a good start.

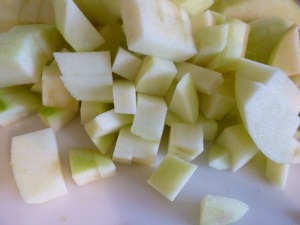
The next thing on the list was the Bramley apple filling.  I chopped my apples,

apples-resizeput some caster sugar into a saucepan over a medium heat, and tried to wait until it had melted without stirring it.  I just about managed it but the sugar had just started to catch when I added butter, water and the apples.  I cooked the apples for a few minutes and let them cool down.

Onto the yuzu/mandarin caramel.  According to the recipe, all I had to do was to put soft light brown sugar into a sauté pan and heat it (no stirring on pain of death) until it had melted and was dark brown.  Really?

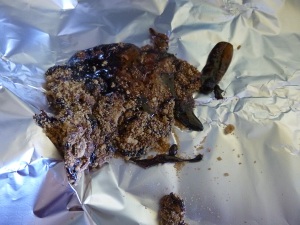
p1020220I threw my first batch away and started again.  My mom and dad were visiting and, at one point, the three of us were stood over the hob prodding at the sugar with a wooden spoon.  In the end, we stirred before the sugar had melted, added butter and cream and then the mandarin juice.  The caramel was OK.  There was a bit of bonfire about it and absolutely no mandarin flavour at all, but it was edible.

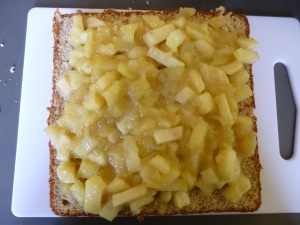
Once everything had cooled, I cut the cake in half, put the Bramley apple filling onto the bottom half, and drizzled the caramel over the top of the apples.  I put the top half on and sandwiched the cake together.p1020221

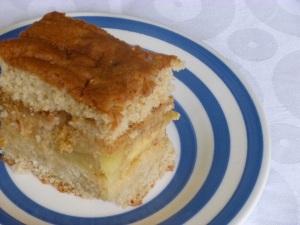
The cake was fine.  A decent apple cake with a decent filling.  The caramel tasted slightly burned, although this was pretty well disguised by the apples.  There was no citrus taste anywhere though, not the slightest hint.applecake-resize

Usually, when I’m not particularly happy with a cake, I know that it’s my fault (or the children’s).   This time though, I’m not so sure.  The baking time for the cake given in the recipe was far too short and the instructions for the caramel were pretty vague (I’ve since found a video at DeliaOnline which makes everything caramel pretty clear – why I didn’t think of going to Delia earlier I have no idea).
I’m pretty depressed about the baking for this year.  Everything I’ve tried has turned out to be a bit on the disappointing side.  Fingers crossed for next time.


*Martini hour – new for 2017 following a new year’s resolution to dust down my lovely but underused martini glasses.  No longer are they underused.  It’s the first resolution I’ve kept until February for years.

Hummingbird Bakery Chocolate Cake with Vanilla Meringue Frosting

I was very excited about making this cake from the Hummingbird Bakery’s Home Sweet Home.  It was my first cake of the year.  It was Chocolate Cake Day.  I was going to take some brilliant photos with my new kit, and the images of my cake were going to break the internet.  In fact, the only thing that did go viral was me.  I came down with something fluish so I didn’t make the cake in time for Chocolate Cake Day.  I’d lost my enthusiasm by the time I felt better enough to make it, and I completely took my eye off the ball (and the recipe).  I doubt that the Hummingbird Bakers would acknowledge that the cake that I ended up with came from their recipe, but it wasn’t bad.  Not bad at all.

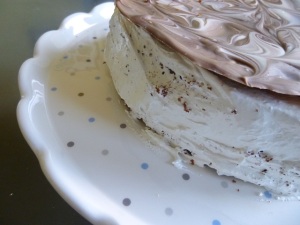
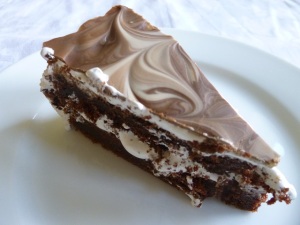
chocolate-cake-meringue-frostingThe cake should be a three layer chocolate sponge, covered with a meringue frosting and topped with a marbled chocolate disc.

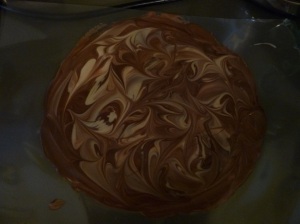
I started with the disc. I melted milk and white chocolate in the microwave (in separate bowls) and poured it onto a plastic pocket that I’d put on top of one of my cake tins (you know the type of thing.  Those plastic flimsies with holes punched in them that you use for filing old bank statements and the like.  Chocolate cake is a much better use for them).  I spread the chocolate over the plastic until I had a disc the same size as the top of the tin, and I made patterns in it with a cocktail stick.  My little girl was intrigued.  I put it right at the back of the work top to set.  Even then I had to keep a keen eye on it to prevent small finger prints or worse.

p1020200 While the chocolate was setting, I made the sponge.  I creamed butter and soft brown sugar together in the KitchenAid, then I added some eggs.  I melted dark chocolate, again the microwave, and added it to the butter/sugar mixture with the KitchenAid on slow.  Separately, I sieved plain flour, bicarbonate of soda and a bit of salt together, and, in a jug a mixed sour cream, espresso and vanilla extract.  Here was my big mistake.  I had a 300ml carton of sour cream and I added the whole carton to my coffee.  I don’t know why.  I’m sure I knew that the recipe amount was less than a carton.  I think my train of thought went something like:

(a) that’s enough sour cream,

(b) but there’s only a bit left in the carton,

(c) when are you ever going to eat it?

(d) true, let’s put it all in,

(e) oh, there’s quite a bit more in the carton than I thought,

(f) too late.

I added the flour and the liquid to the creamed butter and sugar in alternate additions.  I know I could simply have not put all the liquid in but I was distracted by little girl wandering into the kitchen with a gooey ear.  I wasn’t sure whether she was ill, or had just sneaked a Quality Street Golden Penny and had an accident.  It turned out that she was ill and, by the time I’d worked it out, it was too late for my cake.

I poured my mixture into three tins.  It was quite mousse-like and didn’t seem too sloppy, so perhaps the extra sour cream wouldn’t make too much of a difference.  I put them into the oven at 160° (the recipe temperature is 170° for a conventional oven, so, usually, I’d drop the temperature by 20° – I have found with the Hummingbird cakes though, that 150° is too low).  Perhaps 160° is also too low, or perhaps it was the extra sour cream.  Whatever the reason, the cakes wouldn’t cook.  The recipe says to give them 20-25 minutes.  I checked them after 25 – they had a crust on the top but were still molten in the middle.  I gave them twenty minutes longer that the recipe cooking time.

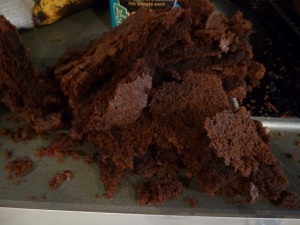
I took them out of the oven and let them cool in the tins for a few minutes before turning them out.  All of them had collapsed quite a lot and one of them just crumbled to pieces as I lifted it out of the tin.

p1020201 It didn’t look cooked in the middle at all.  I took a deep breath.  This was a three layer cake.  It could easily become a two layer cake.  All was not lost.  I waited until the cakes had cooled completely, wrapped them in clingfilm and put them in a tin.  I’d had just about enough of chocolate cake for one day.

I decided to make half the recipe amount of the meringue frosting.  I only had two layers of sponge to cover after all and, usually, Hummingbird recipes are very generous in their frosting.  I fitted my sugar thermometer into a pan and dissolved caster sugar and golden syrup in water.  I brought it to the boil and, despite twitching fingers (no stirring allowed), watched the thermometer until it reached a magic 115°C (soft ball stage).

Meanwhile, I’d been whisking egg whites, cream of tartar and vanilla extract in the KitchenAid.  I’d kept the whisking slow while the sugar dissolved – the recipe says that the egg whites should only just be starting to become white and frothy.  Once the syrup had reached 115° I cranked up the speed and poured it into the egg whites.  I turned the speed up even higher.  The machine started its usual march across the worktop.  I held it down until the meringue became white and glossy, and the bowl had cooled down.

I very carefully lifted one of my very fragile sponges onto my cake stand, put a layer of the frosting on top and lifted my other very fragile sponge onto the top of that.  I covered the cake with the rest of the frosting.  I forgot to put a thin crumb-catcher layer on first, so I ended up with a pretty crumby meringue.  I did manage to get the chocolate topping onto the cake in one piece though.  I was pleased with that.  One thing had turned out right at least.  I was dreading what the cake was going to taste like.

chocolate-cake-sliceAs I said, I don’t think that my cake turned out as it should have.  The sponge was more like a flourless chocolate cake, a bit gooey and brownie-like in the middle, and one of the layers hadn’t made it.  It was still good though.  The frosting was sweet and marshmallow-like in flavour. It went really well with the gooey chocolate sponge.  For a complete cake failure, it wasn’t at all bad.  I’ll have to make another one, pay attention to the recipe, and see what I end up with.  I can’t wait.

Traditional Boule Loaf

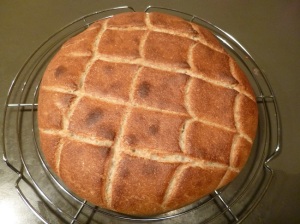
This week I baked a traditional boule loaf from The Larousse Book of Bread. It’s the first recipe I’d made from this book, and the first time I’d made bread using a sourdough starter.  I ended up with a loaf, but I don’t think it was a particularly good one.  It was flat and pretty dense.  I definitely need more practice.

firstloafresize  The starter took four days.  I mixed rye flour with an equal weight of water (Éric Kayser, author of the Larousse Book of Bread weighs water, rather than measuring it by volume.  He says that this is for accuracy).  The water was supposed to have been 30°, I do have a digital thermometer but it doesn’t work particularly well and always seems to register 40° when I turn it on.  I gave it a couple of minutes.  It was still at 40°.  I put it into the freezer.  It went down to 22.  I think I may have to get a new one.  With no thermometer, I just had to guess.   Warmer than body temperature, but not too hot.   I doubt very much whether Éric Kayser would approve.

I added some honey to the flour/water mix, covered the bowl with a cloth and left it by the radiator.  The starter was supposed to be left somewhere warm for 24 hours.  The radiator in the kitchen is warm, but it’s not on for 24 hours and we don’t have a particularly “warm place”, like an airing cupboard. Our house just isn’t built for the cultivation of sourdough starters.

There were a few bubbles on the surface when I returned to it the next day, but not as many as on the pictures I found when I Googled “sourdough starter”.  Oh well.  I mixed more  rye flour with more water (again at a very roughly estimated 30°) added more honey, then added the mixture from the previous day.  I repeated on day three but without the honey. On day four, I added plain flour and water.  At this point, according to the recipe, it should have the consistency of thick pancake batter, and should be ready to use.

sourdoughstarterresize

There’s a small amount of yeast in the recipe as well as the sourdough starter (the book says yeast is used to complement the action of the starter, rather than replace it).  The recipe uses fresh yeast, but I’ve never been able to find any.  I sent a quick query to a local bakery about whether fresh yeast was worth it and they said they only use dried.  Well, Bread & Co make lovely bread, so if dried is good enough for them…

I mixed my dried active yeast with some warm water and a little bit of sugar and left it on the radiator.

While it was there, I put the rest of the ingredients into the bowl of the KitchenAid: plain flour, water (which was supposed to be at 20° – I had no idea of the temperature) the starter and salt.  Now, had I done more than flick through the preliminary pages of the Larousse Book of Bread I would have known that I’d made a mistake.  In the Kneading in a Stand Mixer section, it says that the ingredients must be put into the bowl in a specified order.  The yeast should have been in there before the salt.  Too late.  I added the yeast (which had bubbled up a bit, but not as much as I’d have liked).

I kneaded the mixture exactly as the recipe told me to.  Four minutes at low-speed, six at high-speed.  I ended up with a soggy mass.

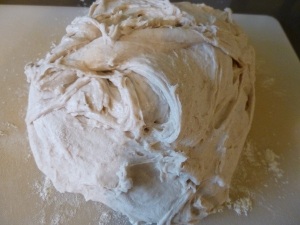
I was supposed to be able to shape it into a ball at this stage.  No chance.  The only thing I could think of to do was to add more flour and knead some more.  I did this several times over until I eventually had a dough that I could just about shape.
doughThings were not looking very good at all.
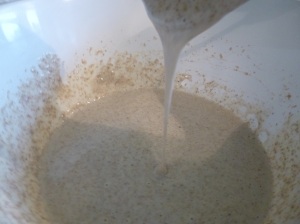
I managed to shape the dough into a ball.  I covered it with a damp cloth and left it for a couple of hours.  When I came back to it, it had flattened out considerably, and had stuck to the cloth it was covered with.  I scraped what I could off the cloth (the cloth itself had to go into the bin) reshaped it, covered it (this time I used foil, and made a kind of roof over the top of it) and left it for another two hours.

To bake bread, the Éric Kayser recommends using a convection oven.  I usually use fan, but ours does have a top and bottom heat setting that the manual says is good for baking bread.  I set the oven.  It filled with smoke. I let the smoke out.  It filled with smoke.  This cycle repeated itself a few times until, at last, I had an oven that was relatively smokeless.  I put a roasting tray into the bottom of the oven to heat up, and scored the top of my, rather flat looking, boule loaf.  I transferred it very carefully – it was still quite sloppy – onto a baking sheet lined with baking paper.  I poured a cup of water into the roasting tray and put the loaf into the oven.

I took it out after about 35 minutes and put it onto a wire rack to cool.

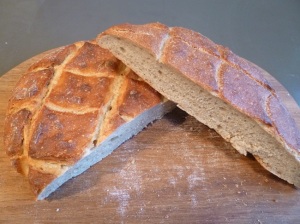
firstloafresizeMy boule was flat, and really dense.  Not at all like the picture in the book, which shows slices of very well risen, very light and airy bread.  It did taste good though (although we were eating if after a couple of espresso martinis and it was fried and covered in very tasty stuff: broad beans, goats cheese, roasted peppers).

I had another go a couple of days later.  This time, my starter was a bit more lively, and I left my yeast to bloom for a bit a longer.  I also added the water in stages rather than all at once.  This time, the dough was a lot easier to work with, although still on the sloppy side, and it rose a lot better.  The crumb of the loaf was a bit more aerated but, to be honest, not that much.  Here’s the two to compare (the one on the left is the second attempt).

finishedloaves2I think I need at lot more practice to make a decent loaf (a thermometer that works would also be useful).  That said though, we did eat all of it and the children really liked it.  Practice makes perfect I suppose.


Norfolk Plough Pudding

A belated Happy New Year to everyone.  It’s been a long, long time since the white chocolate and cranberry cupcakes.   I do do quite a bit of baking around Christmas (and this year, the fruit in the Christmas cake didn’t all sink to the bottom, and I even attempted a yule log) but I just don’t get the time to write about it.

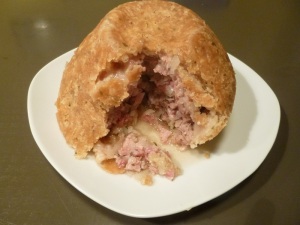
I have two new books for the start of 2017, British Baking by Paul Hollywood and the Larousse Book of Bread  by Éric Kayser.  This week, I decided to give Mr Hollywood a try and, since we still have Christmas cake on the go and, until yesterday, when I eventually threw the last dollop away, a new year’s trifle, I decided to go savoury with a Norfolk Plough Pudding.  It’s not something I’d heard of before but, according to the recipe, it’s a suet pudding, traditionally served on Plough Monday – the first Monday after Twelfth Night.  I think that was a couple of days ago, so my plough pudding was pretty appropriately timed.   Here it is.

plough puddingThe challenge for this one was going to be the suet pastry.  I’d never made it before so I was completely in Paul Hollywood’s hands.

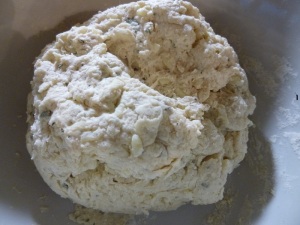
I mixed self-raising flour, baking powder, beef suet, some chopped sage and salt and pepper together and added water.  The recipe says that you want enough water to make a soft, slightly sticky dough.  This is what I ended up with.

ploughpuddingdoughresize

Soft enough? Sticky enough?  I didn’t know.

I wasn’t sure whether I needed to rest or chill the pastry before rolling it out.  The recipe didn’t say anything, so I went right on with the rolling.  First, I took a third of the pastry and rolled it out to make a lid to fit a 1.2 litre pudding basin, then I rolled out the rest of the pastry into a circle so that I could line the basin with it (30cm diameter).

Lining the basin was tricky.  This is where I found that my dough was probably a bit too sticky.  What I was supposed to do was to fold the pastry into thirds so that I could lower it easily into the pudding basin. Folding my dough into thirds was easy.  Unfolding it?  A completely different story.  My thirds just stuck together.  I sort of managed to open it out again, but on the worktop, not in the basin.  I wrangled the pastry onto a rolling-pin, dropped it into the basin and moulded it as well as I could around the sides.

p1020175It didn’t look too bad, but then again, I’d never made it before I didn’t know what it was supposed to look like.

Plough pudding is lined with sausage meat and filled with a mixture of pancetta, onion and thyme.  I didn’t know whether our butcher would sell sausage meat (as opposed to sausages), and when he told me that I could just let him know what type of sausage I wanted and he’d just take it out of the skins for me, I was a bit flummoxed.  Obvious I suppose, but I wasn’t expecting a choice, and I went for the first name that I could see in the sausage cabinet. Bumblebee.  It wasn’t until my bumblebee sausage meat was out of its skin that I noticed that bumblebee sausages were flavoured with honey and mustard.  I was in trouble.  My husband hates mustard. Hates it.  It was too late to change my mind about the sausage meat.  I decided to keep quiet. Fingers crossed that the mustard in the bumblebee sausages would be very, very subtle.

To line the pudding with the sausage meat, I rolled it out between two sheets of clingfilm.  Rolling it out was OK, but lining the basin was the fiddliest of fiddly things.  There was no hint of this in the recipe, just “lift it into the basin,” says Paul Hollywood.  My version went a bit more like this, “scrape it off your clingfilm into a heap at the bottom of the basin and do your best from there.”

I would have taken a picture at this point, but my hands were dripping with bumblebee sausage meat and, by the time I’d got it all off I’d forgotten.

I mixed diced pancetta and onion, some chopped thyme, dark muscovado sugar and a little bit of black pepper and put it into the basin.  I put the pastry lid onto the top, sealed and trimmed the edges.

I covered the lid of the basin with a layer of baking paper and a layer of foil which I’d put a pleat in, tied the cover on with string and put it into a saucepan to steam.  I gave it three hours, checking once in a while to make sure there was still enough water in the pan.

This is how it turned out.

ploughpuddingresizeWe had it with cabbage, carrots and a red wine gravy and it was very good. I wasn’t sure about the suet pastry, I didn’t like the texture all that much, but the filling was really tasty.    I can imagine it would be just the thing you set you up for a day’s ploughing, or whatever backbreaking work that get’s done on Plough Monday.  Jon enjoyed it pastry and all, and there was not one mention of mustard.